Offloading is the process of adding clips or files to the Silverstack Project Library, while copying them from a camera, field recorder or storage device to one or several backup drives. In order to make it possible you can follow these directions:
Prepare for Offloading
First of all you have to assign clips to a project. By default, clips are offloaded into the project currently selected. You can create a new project by using the project selection menu on the top center of the main UI window.
Additionally, it’s possible to select a folder from the library tree on the left panel before starting. This way you will be able to set the folder on which the bin containing the new clips will be placed within the Project Library. That bin will have the same name as the source volume storing the footage. In case the current selection in the library tree is a bin, a new bin will be created as a sibling of the selected one.
Starting the Offload
Offload source selection
After mounting the storage device containing the clips that you’d like to offload, you have several options to start the offload process:
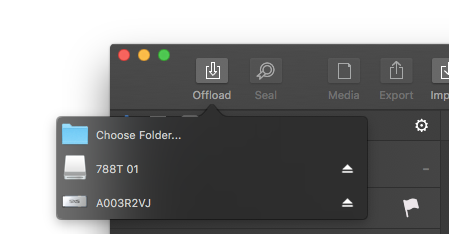
- Click on the ‘Offload’ icon on the toolbar and select the volume you’d like to offload from.
- Choose Library > ‘Offload’ from the Silverstack menu.
- Right click on a folder or bin in the Project Library tree (left panel) and choose ‘Offload’ from the context menu.
- Drag the folder or card from Finder onto Silverstack’s icon in the Dock window.
When using options #2 and #3, a Finder directory browser will open and you’ll need to select the volume or folder you’d like to offload from.
Offload Wizard
The ‘Offload Wizard’ is the popup window that appears after choosing the Offload source. At this stage, Silverstack will try to automatically detect the camera format by scanning the files. After scanning the chosen source drive, all found files will be shown in a table. If, in an exception, Silverstack should not choose the right camera format, you can set the correct format by clicking on the ‘format selection button’. The import options for the multiple camera types can be found and edited in the application preferences menu, under the Formats tab.

The Offload Wizard: the ‘Ingest and Create Thumbnails’ section
Silverstack by default offloads all the clips and files contained in the scanned device. Additionally, if you just need to offload a subset of clips, you can check the ‘Allow partial offload’ checkbox. Clips can be marked and unmarked either by using the checkboxes or the ‘mark’ and ‘unmark’ buttons by the ‘search’ field. Therefore either select all clips you’d like to import and then click on ‘Mark Only Selected’ or select those clips of all already marked that shall not be imported and click on ‘Unmark Selected’.
As you can see in the following image, there is a bunch of keyboard shortcuts for marking and unmarking clips to facilitate this task.

‘Allow partial offload’ mode keyboard shortcuts
Additionally, Silverstack is prospecting for duplicates (clips already existing in the Project Library) when scanning a source drive and prevents them from being offloaded by default. If you need to include duplicates nonetheless, please enable the ‘Allow import of duplicates’ checkbox.
Sometimes Silverstack will skip some hidden files and empty folders during the copy process, as shown in the image below. If you click on ‘Learn More’, a popup window will show which files are ignored.

‘Skipped Files’ warning
You are able modify this behavior in the application preferences menu, under the ‘Ingest’ section. In addition to the settings in the Preferences menu, the following files are always ignored:
– Mac OS X resource fork files (starting with ._)
– MHL, MD 5 and SHA 1 files that have been created by Silverstack on previous copy tasks
When you are done with your offload source choice, you can proceed to add the copy destinations.
Setting up the copy destinations

The Offload Wizard: the ‘Copy and Verify’ section
In this section you are able to choose the destination volumes to which Silverstack will copy the clips and files. To edit the import options, click on the ‘Edit’ button. The number of volumes that Silverstack can simultaneously offload to is only limited by your hardware.
Adding a new destination is done by pressing on the ‘+’ button on the lower left of the table. Click the ‘-‘ button next to it to if you’d like to remove the selected destination drive.
In relation to the additional options under ‘Verification Behavior’ and ‘Checksum Method’, you can find a detailed description of each one of those settings in the article The Copy and Verification Process in Silverstack: Verification Behavior.
Silverstack offers the possibility of saving offload wizard templates. These templates can be chosen through the drop down menu on the top right of the Offload Wizard. For more information about the templates, please check the article Offload wizard templates.
For a detailed description of how the copy and verification process works in a cascading copy scenario (Silverstack XT and Lab), as well as other available settings for this mode, please check the knowledge base article Cascading Copy.
There is also the possibility of using the Path Wildcards feature, which offers users a way to create custom folder structures based on the metadata contained in clips.
A file renaming pattern can be selected to change the original file and clip names of selected camera devices during the offloading process. Check the KB article File Renaming on Offload to get a detailed guide on how to use this feature.
Path Wildcards
In the path wildcards window, the pull down menu button with the gear icon gives you the possibility to choose from recently used wildcards (see screenshot below). To work efficiently with wildcard paths it is also possible to copy and paste a path from the wildcard window including wildcards like regular text to and from a text document.
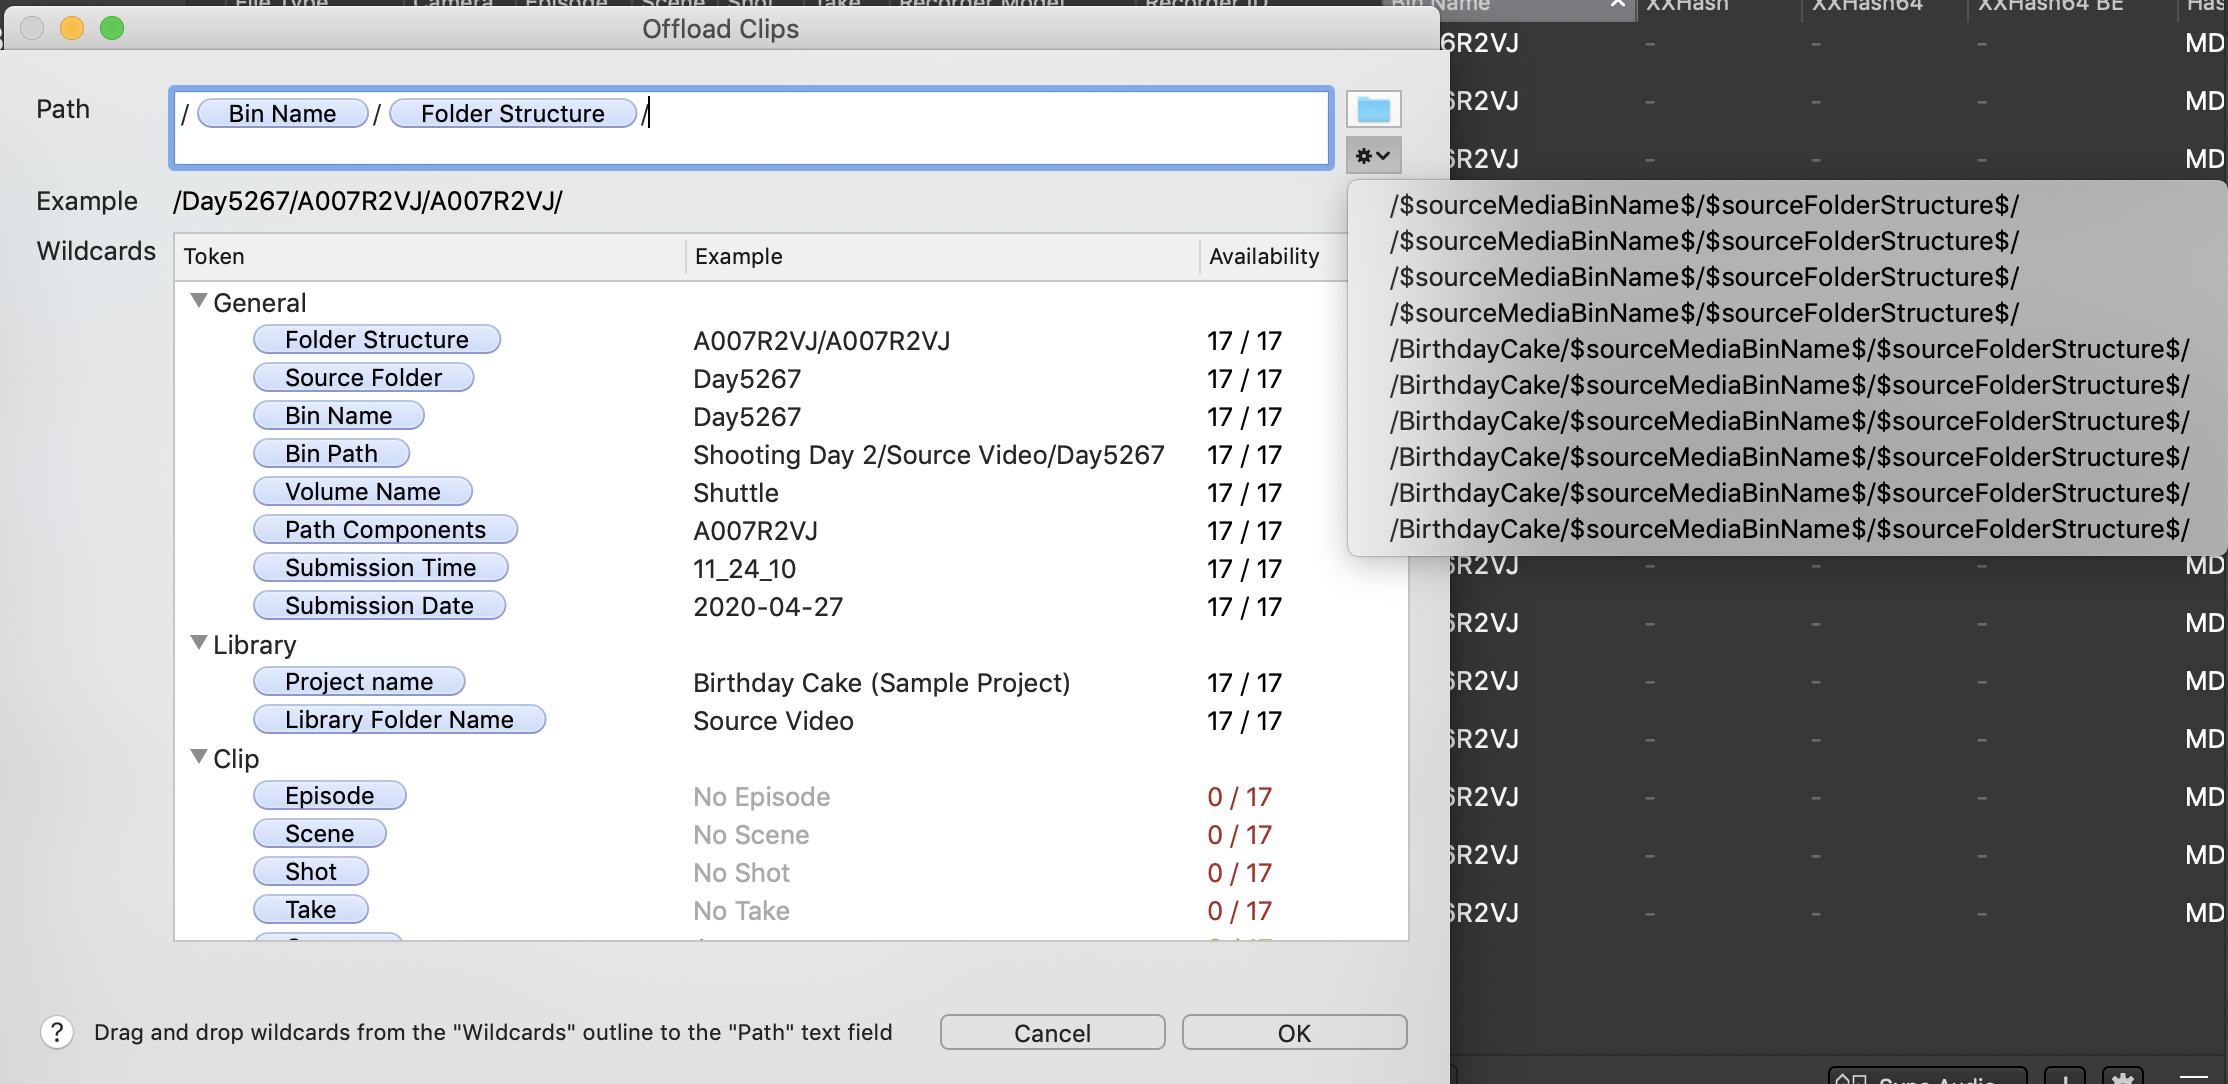
Recently used wildcards options in the pull down menu.
By default the original folder structure of the source is maintained. However keep in mind that you are able to influence that behavior by using path wildcards and can like this also dissolve the original folder structure on the destination.
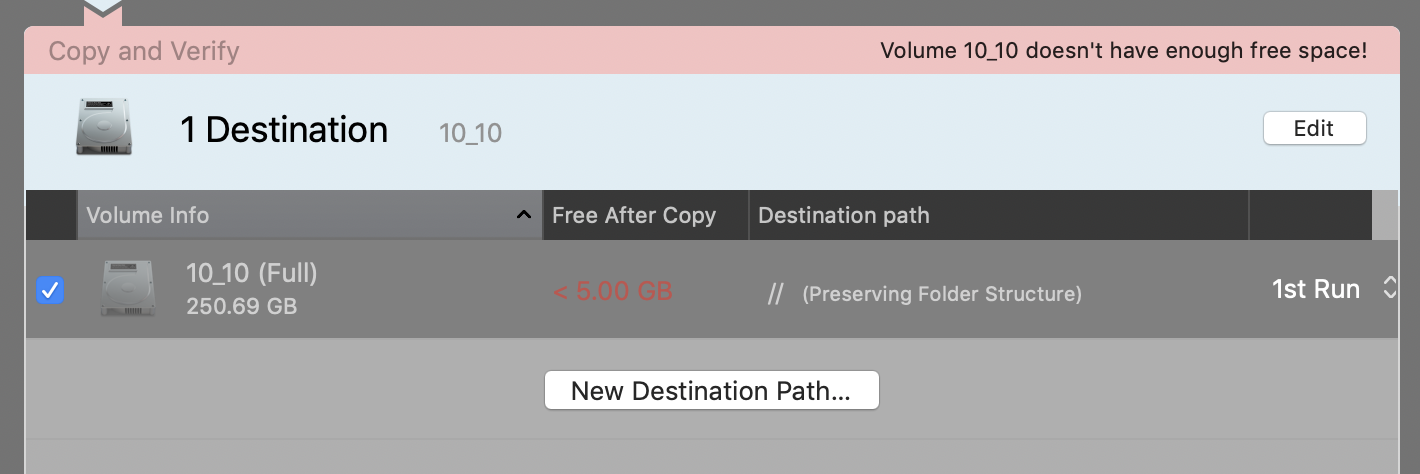
Disk Full
If the disk is full the copy and verify step of the offload wizard shows if the disk doesn’t have enough free space to copy to it. This is shown as below:
Starting the Copy Process
After determining your copy destinations and settings, click on ‘Offload’ to register the clips to the library. Silverstack will ingest all the metadata from the clips and create thumbnails for them. Once that process is complete, the copy and verification job is going to sart. All the information about the offload process can be supervised in the Jobs panel.
- Note: if you just need to create references to video clips in the Project Library and skip the copy and verification process altogether, please check the knowledge base article Adding Clips to the Library (Ingest without Copy).
Related articles:
Multiple simultaneous copy jobs in Silverstack
Adding Clips to the Library (Ingest without Copy)
The Copy and Verification Process in Silverstack: Verification Behavior