Livegrade comes with support for Teradek COLR. The Teradek COLR is a LUT-Box that can be controlled wirelessly by Livegrade and offers a LUT size of 33 x 33 x 33.
For general information about setting up Livegrade with HD-SDI devices please refer to the article HD-SDI Setup for Livegrade.
Adding the Teradek COLR as a Device
In order to exchange look information with Livegrade, the Teradek COLR needs to have a working network connection with the Mac where Livegrade is running on.
It’s possible to wirelessly connect Livegrade to the Teradek COLR by choosing the wireless network the COLR device is producing from the list of networks on your computer:

Choose the wireless network of the Teradek COLR from the list of networks.
The COLR device can also be connected via USB or Ethernet for a tethered connection.
Once a correct connection is established, launch Livegrade and you can proceed to add the COLR as a device. In order to do that, you can choose “Slots” in the main menu and then “Add Device”. Alternatively, you can add the device through the Device Manager.
After that, a configuration window opens:
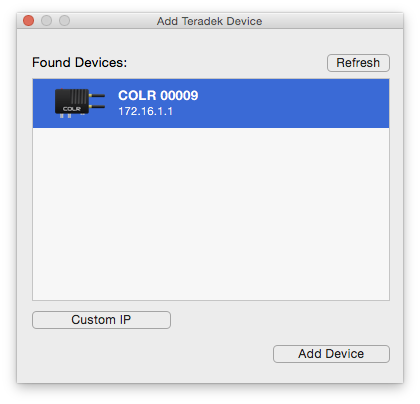
Add Teradek Device
By hitting “Refresh” you can search for compatible devices connected to your network. All devices found will show up in the table view. Select the intended device and click “Add Device” to add the device to the selected slot.
If you want to add devices by a certain IP-address rather than letting Livegrade search for them in your network you can hit the button “Custom IP” to reveal a text field where you can enter the IP-address of the chosen device.
If connected properly the Teradek COLR will show up as a “Device” row in the Device Manager with a green button indicating a positive connection status :
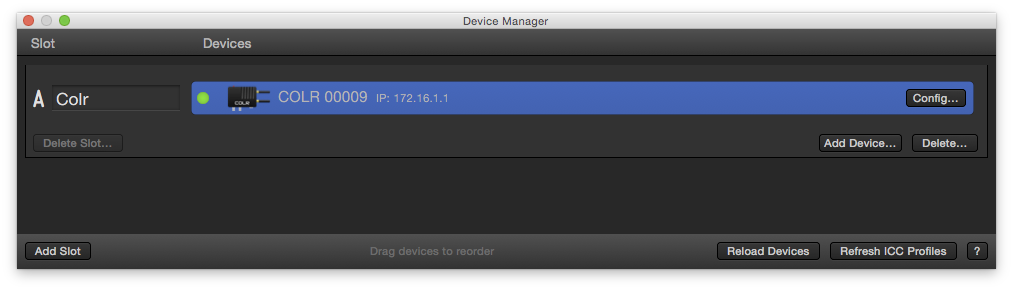
The Device Manager shows a properly connected Teradek COLR.
By clicking on the button “Config…” an info window opens where you can see all information available on your device:
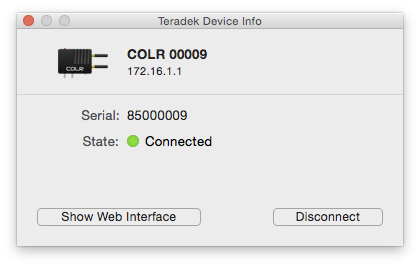
Teradek Device Info
The Teradek COLR has a web interface where you can make changes to the configuration of the device. You can access the web interface by clicking on the button “Show Web Interface”. There you can e.g. alter the name of the Teradek COLR as shown in the Device Manager.
Working with the Teradek COLR in Livegrade
In the main Livegrade window, the Teradek COLR is now displayed in the corresponding grading slot as a device.
After selecting the correct grading slot you will be able to adjust the look that is sent to the COLR by modifying it in the Main Window of Livegrade.
Note: The Teradek COLR can be used with different grading modes such as e.g. “CDL and LUT”, “CDL Advanced” or “ACES CDL”. The interaction speed may vary in different modes: As the COLR device natively supports CDL plus LUT grading modes, a setup with CDL plus LUT node in this order will interact fluently. Other more complex grading modes may interact a bit slower.
You can permanently store up to 32 looks on the Teradek COLR. In order to store a new look on the COLR perform a right click on a look from the Look Library and choose “Permanently Store Look on… -> Teradek Device at A – Colr… -> …” to either add the look as a new preset or overwrite an existing preset:

Permanently store a look on the Teradek COLR.
You can also manage the looks (rename, delete) in COLR’s web interface.
Above all, a look can also be applied to the HDMI output of the Teradek COLR. That even allows a conversion from HD-SDI to HDMI containing looks.