Presets are files that contain specific look settings that you can apply to an image. You create, store, and modify your custom looks. Looks can be only stored directly in Bins, and Bins can be grouped in Folders.
The Look Presets library
All actions with Look Presets are grouped in the Look Presets panel in the upper right of the Livegrade UI.
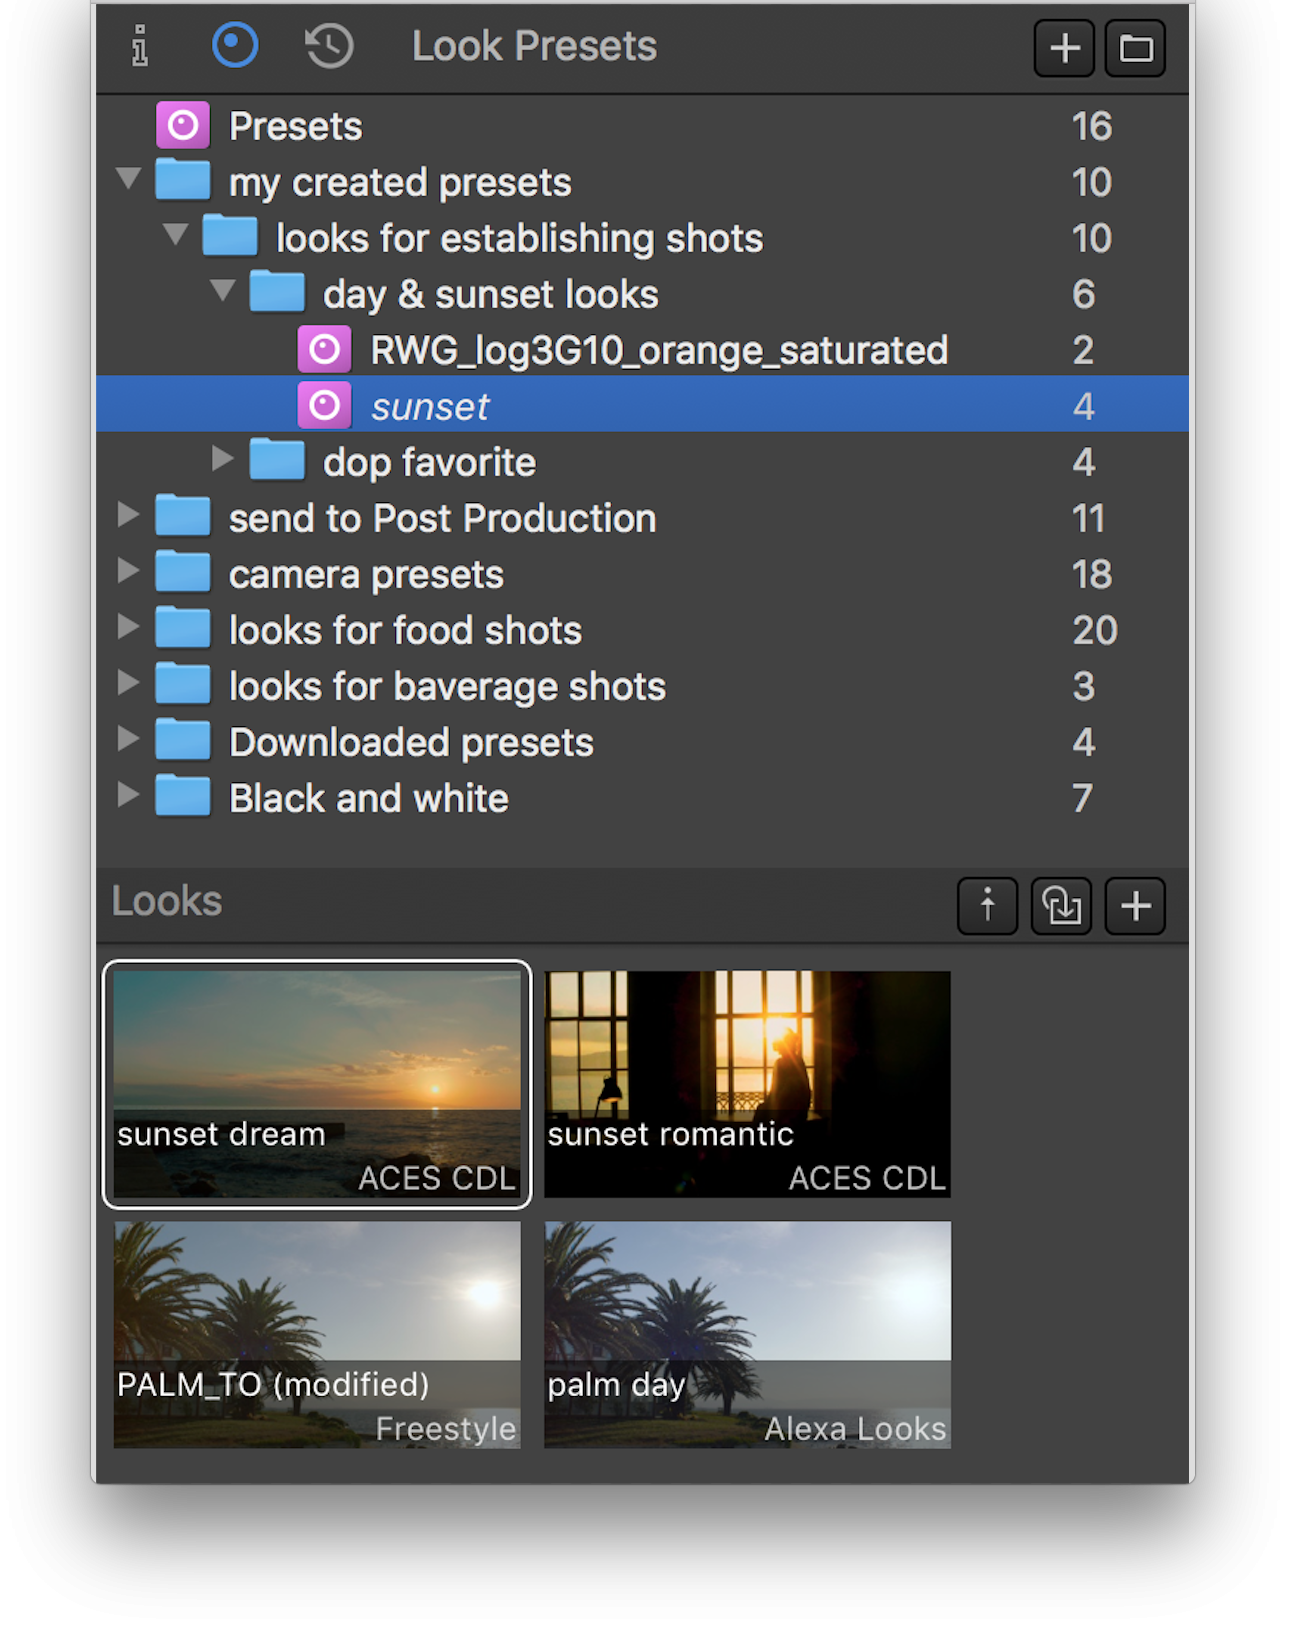
Figure 1: Look Presets
The Look Preset panel’s toolbar contains controls to switch between Information Tab, Look Presets Tab , and History Tab. The “plus” icon creates a new Bin and the “folder” icon creates a new Folder. A “Presets” bin is already created for each project.
When you right click a bin or folder you have the options to add new folders, bins, and delete items in the Look Preset library and set the Default Bin. You can also access same actions from the drop down menu on the main menu toolbar.
“⌥B” the default shortcut assigned to create a “New Look Preset Bin”.
The Default Bin
When you collect a set of bins in different sub folders/folders in order to categorise them you have to choose which bin should be act as the “Default Bin”. This helps you to target where to add a new look in a selected folder. If you skipped this decision, the moment you add a new look in Looks panel, a “Default Bin” will be created automatically within selected folder on the Look Presets panel . A “Default Bin” is distinguished from other bins by his name converted in italic.
The Look Presets
Below the Look Presets library, the Look panel is ready to collect your new looks with thumbnails and quick informations like name of the created look and Look configuration source, your colour management starting point. A Look Preset has a thumbnail, a name, and the grading mode it has been created in.
Inspecting Presets in the Look Library
- Collection view. In the Look Library’s collection view look and node presets are indicated by a little icon top-left corner. You can click on the little “i” in the bottom left of a preset to display information about the presets.
- List view. To see all your presets listed including metadata, switch to the list view.

Presets Collection View

Presets List View
How to create a new Look Preset
There are several ways of creating Look Preset.
- Choose a Slot. When you are done with adjusting the current look of the slot, give a name to your look and click the “+” button above the Look Presets collection. When the new Look Preset has been created you can edit its name.
- You can also use Livegrade main menu toolbar, choose Create Look Preset from the Look Presets menu. (Default Shortcut G).
- You can also create a Look Preset from a shot in the Shot table. Drag and drop directly on the Look Presets panel.
Both of these actions will create a thumbnail which contain the same image and look with the Slot panel or Shots panel.
- Navigate Main Menu toolbar > Import Look As Look Preset > select the look > select Grading Mode. Choose your Look in .cdl or .xml from your desired look archive.
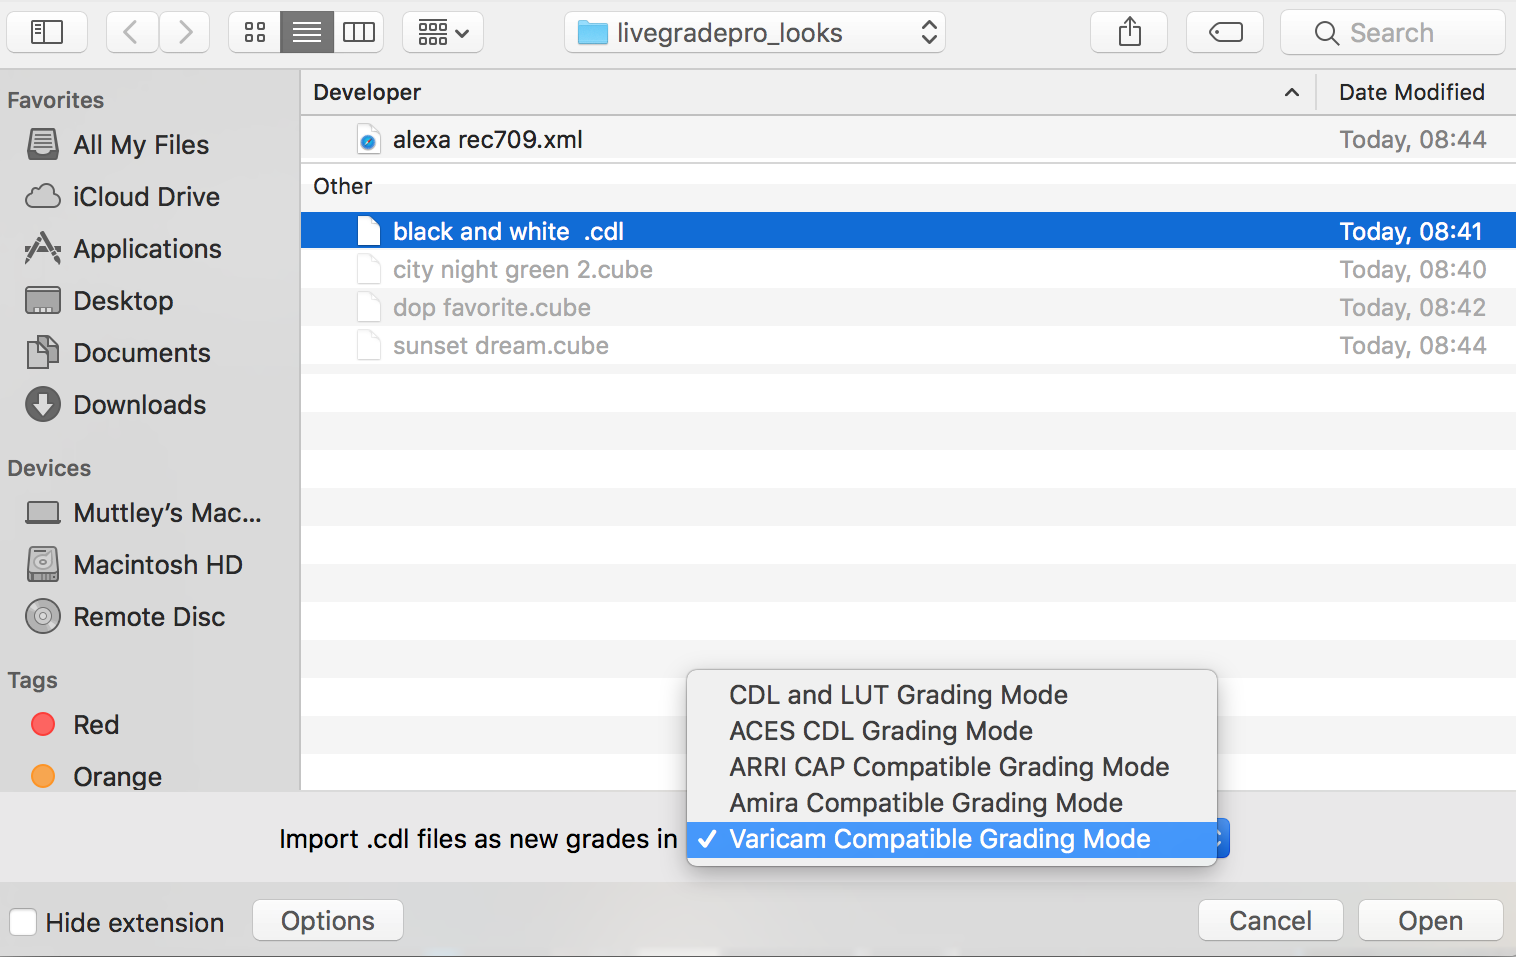
Figure 2: Import Look As Look Preset
Then the new imported look file goes to the currently selected bin or to the assigned Default Bin. If there is no Default Bin in the folder, it’s automatically created.

Figure 3: Import Look As Look Presets
Every look that you store on the Looks panel is also stored in a bin selected by user on the Look Presets panel. Numbers indicates how many looks are in that bin or folder. You can reorder any time your Look Presets panel simply by drag and drop bins or folder within each other. Thumbnails also can be dragged to the desired bin.
HOW TO UPDATE A PRESET AND REPLACE A THUMBNAIL LOOK
There are several ways to update a preset and replace a thumbnail look.
- Select the thumbnail that you want to update on the Looks panel toolbar. Click on the middle icon.
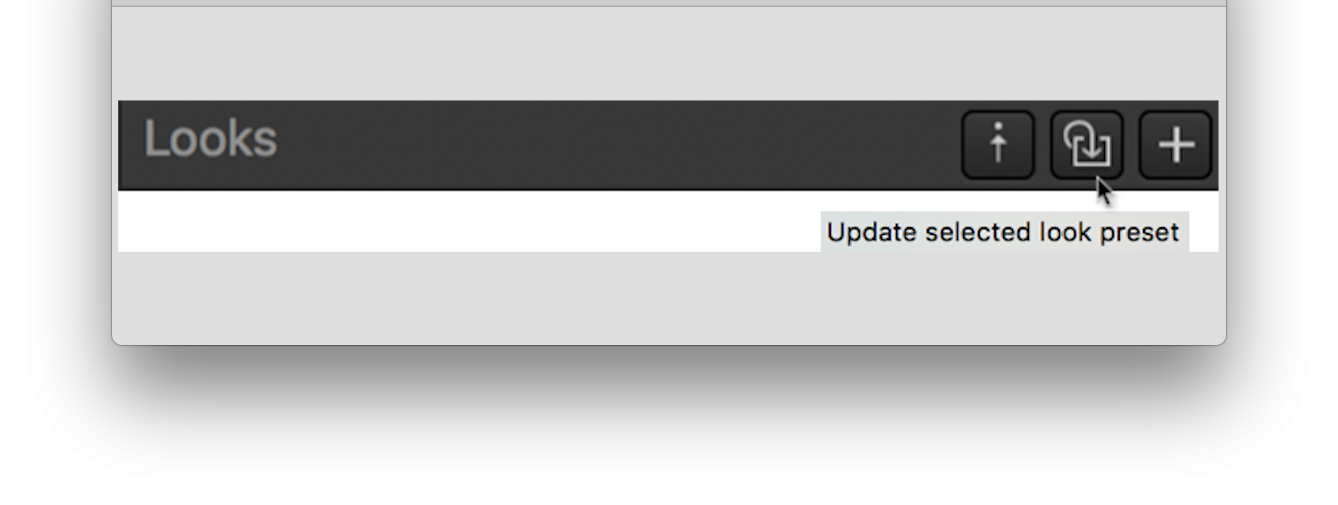
Figure 4: Update selected look preset
- Or Select from the main Menu toolbar Look Presets > Update selected Look Preset

Figure 5: Menu toolbar-Look Presets-Update selected Look Preset
- You can select the thumbnail that you want to update on the Looks panel. Right click on the thumbnail. Select Update Preset from the drop down menu.

Figure 6: Looks panel-Update Preset
These actions replace only the old look with the new one from the selected slot . The original Thumbnail (image) remains the same.
- On the Looks panel you can also right click on the thumbnail. Select Update Preset and Replace Thumbnail from the drop down menu.
This action replace either the look and the thumbnail with the same image and look based on the selected Slot.
HOW TO APPLY SELECTED LOOK PRESET
You have multiple choices to apply selected look preset. Select the Slot that you want to update look.
- Click on the first icon.

Figure 7: Looks-Apply selected look preset
- Navigate main menu toolbar Look Preset > Apply selected Look Preset . ( shortcut H )
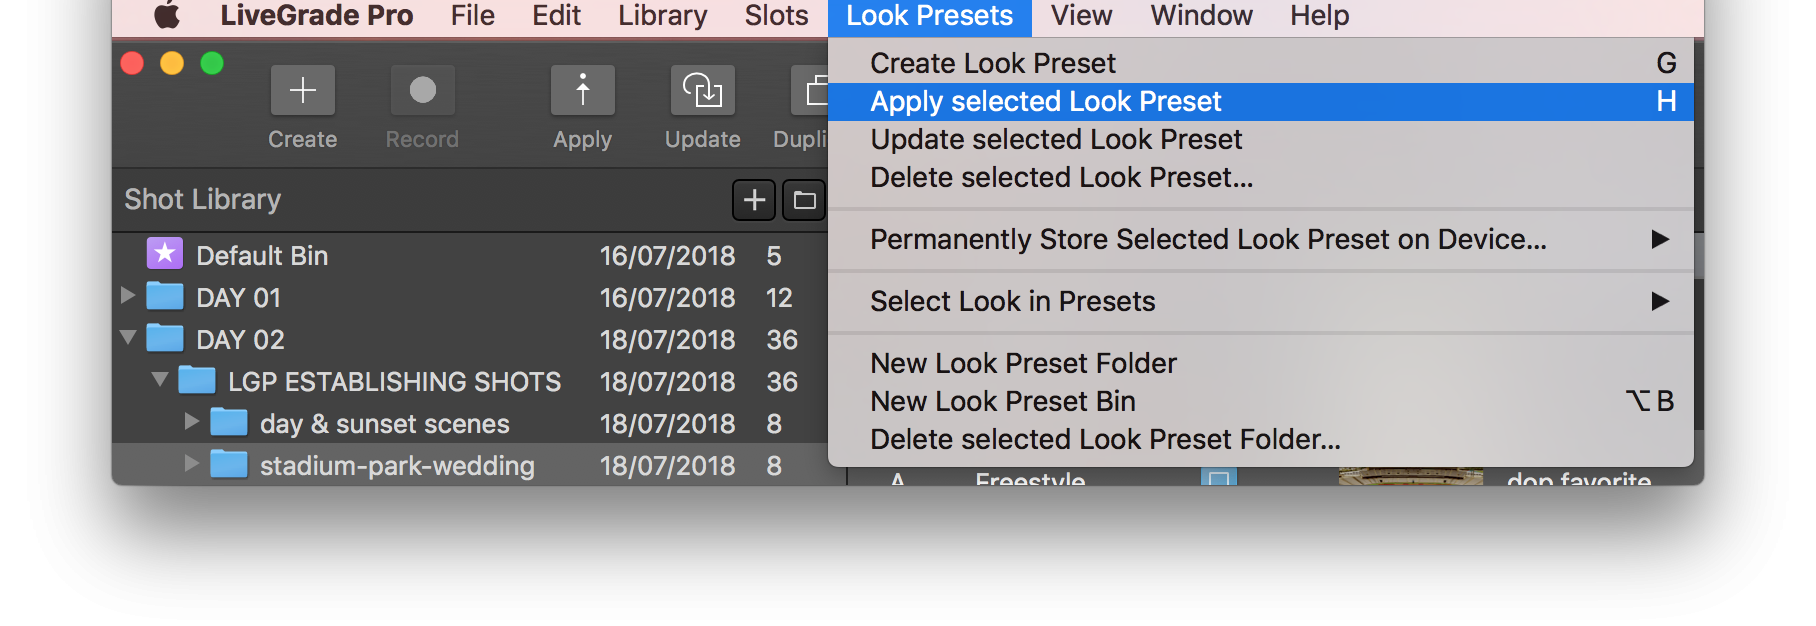
Figure 8: Apply selected Look Preset drop down menu
If Library Slot is selected Apply selected Look Preset is disabled.
HOW TO APPLY SELECTED LOOK PRESET TO MULTIPLE SHOTS IN YOUR LIBRARY
You can apply a Look Preset to update Shots in your library.
- Select the shots in your Library you would like to update
- Right-Click on the Look preset that you would like to be applied
- Choose Apply Preset to Selected Shots

Apply Look Preset to Selected Shots
HOW TO DELETE A SELECTED LOOK PRESET
- Select the thumbnail that you want to clear from the bin or folder on the Looks panel
- Main menu toolbar Look Presets > Delete selected Look Preset Folder > confirm
Deleted look is also removed from the associated bin on the Look Presets panel.
This action cannot be undone!
You can also duplicate a selected thumbnail. They will have the same name as the original file with and additional number 1,2,3… and so on.
It could be easier to navigate between thumbnails via shortcuts ⌥1,⌥2,⌥3,…⌥9.
HOW TO STORE SELECTED LOOK PRESET ON DEVICE
- Main Menu toolbar > Look Preset > Permanently store Selected look Preset on Device > choose proper device from the drop down menu
- Or just Right Click on the thumbnail > Store permanently on Device > choose proper device from the drop down menu.
HOW TO SAVE SELECTED LOOK PRESET
- Choose your look or looks to export on the Looks panel.
- Main Menu toolbar > File > save selected Preset Look As > choose one from the drop down menu.
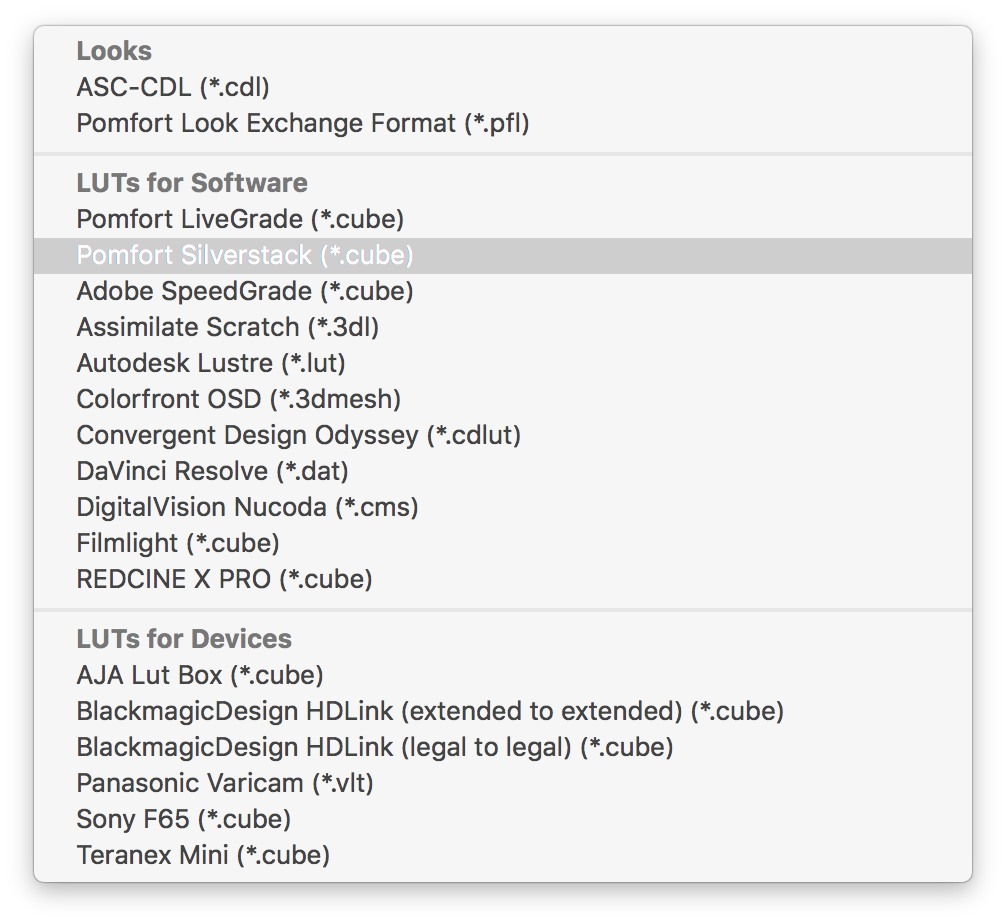
Figure 9: save selected Preset Look As