Shots
The shot library stores all shots of the current project. Users can view, manage, and recall their shots in the shot library.
Shots are stored in bins, and bins can be grouped in folders. You can organize folders within folders to create a project hierarchy. Selection of bins and folders behaves recursively: Selecting a folder shows the shots of all the bins and folders in the selected folder.
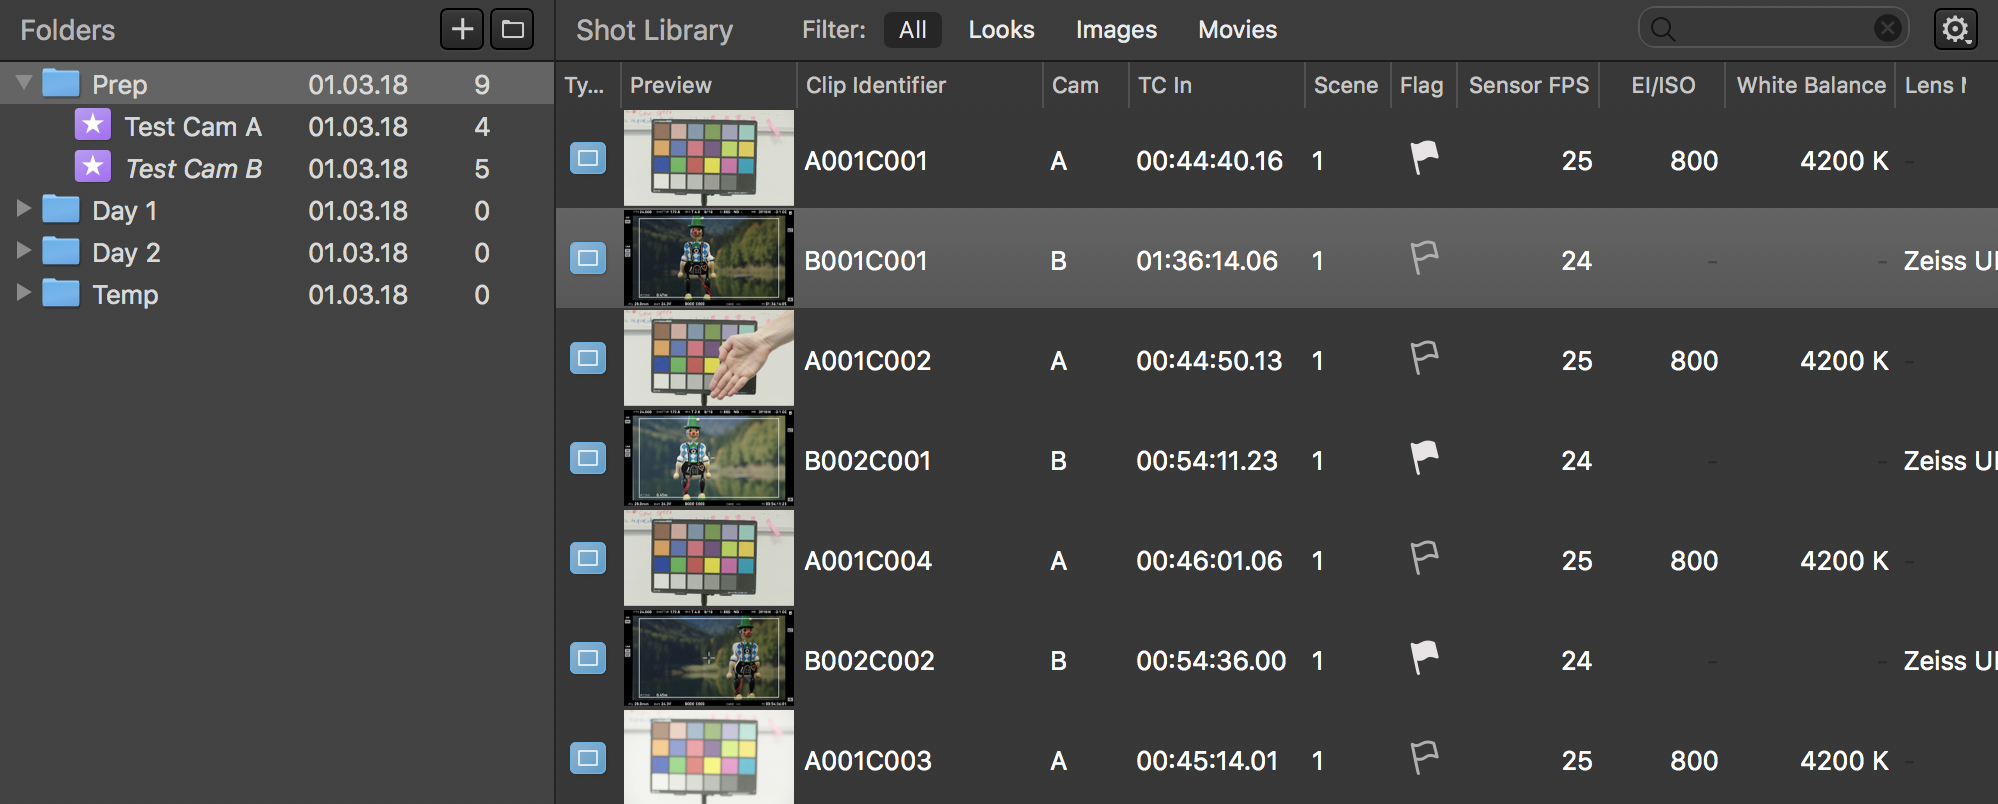
The shot library with bin and folder outline
Each “shot” (e.g. each entry in the shot library) consists of
- all associated clip metadata received from the camera and from custom-filled metadata fields,
- the look metadata with all grade settings from the slot where the shot has been created from, and
- an optional media asset, such as a framegrab or movie recording (if available from a capture device in the slot where the shot has been created from).
All shot information is collected at the moment of creation, but can be either edited or updated at a later time if needed.
Note: You can update the clip identifier of selected shots via the “Recreate Clip Identifier” menu item. The clip identifier values are then updated based on the current shot metadata and the active naming scheme set in the shot creation preferences.
Media assets can be framegrabs or movie recordings generated within Livegrade while creating the associated shot, or imported images, imported still images from a movie or imported movie files.
Shots can be tagged with a color labels and a customizable label text. The custom label text can be edited in the “General” preferences. A default label or secondary label can be applied on shot creation. Set values for default label and secondary label in the “Library” preferences. “Create Shot” and “Create Shot (with Secondary Label)” then apply the desired label directly on shot creation.
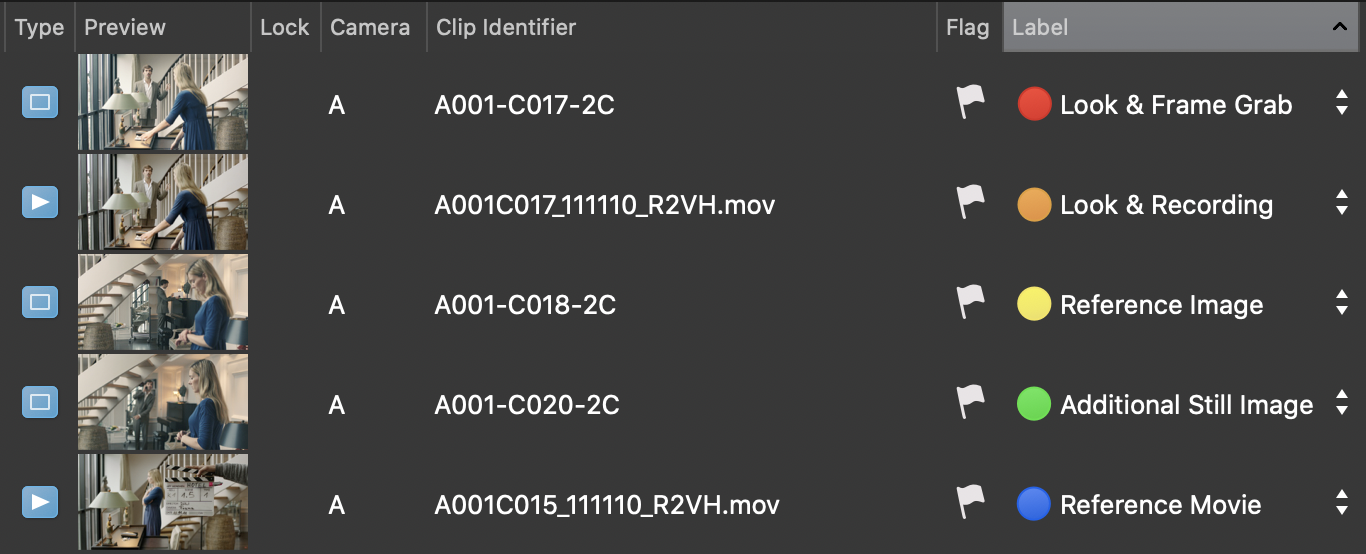
Shots tagged with labels
The primary actions for lists of shots are:
- Export look metadata of selected shots as CDLs or lookup tables
- Create shot reports as PDF from a bin or folder
- Export a bin or folder to Silverstack’s automatic look matching feature.
The primary actions for single shots are:
- Apply the shot’s attached look of a selected shot to the current slot
- Use the shot’s attached still frame or movie clip as a reference (e.g. split screen) in the current slot
- Output the shot’s attached still frame or movie clip to HD-SDI (either in the current slot or permanently in the library slot)
All actions are available through context menus (right-click) or main menu entries / keyboard shortcuts. PDF reports are now customizable, the selection of columns in the report follows the selection of columns in the shot library.
Smart Groups
There is an advanced “Smart Groups” view accessible from the shot library window, that displays a hierarchical structured outline of the currently selected folder level of the shot library.
Smart groups are auto-generated based on shot metadata. You can define the hierarchy levels for the outline in a gear menu, that provides the metadata fields “Season”, “Episode”, “Flagged”, “Label”, “Crew Unit”, “Shooting Day”, “Scene”, “Shot”, “Take”, “Camera”, “Caption”, “Location” and “Rating” to choose from. You can also apply from predefined layouts or save custom layouts.

Smart Groups
If you like to work with Smart Groups only you can hide the Shot Library Outline on the left side via
- unchecking View > Show Shot Library Outline
- or by pressing the following button above the Shot Library:

Note: Smart groups are pre-filtered by the selected folder/bin in the shot library sidebar. When you want to view all available items in the library, make sure to select the “Library” home folder in the shot library sidebar.
The path in the “Shots” sub-toolbar shows the current library folder and smart groups level and lets you browse and choose within the library.
Library path with smart groups level
Shot Info Panel
The right panel besides the shot library has three tabs: One for the shot info, one for look presets, and one for the history.
The Info tab shows detailed information about the currently selected shot and a preview image. You can resize the preview image by resizing the right panel. You can also edit metadata field of the selected shot or multiple selected shots. A search bar on the top lets you filter the displayed fields and metadata.
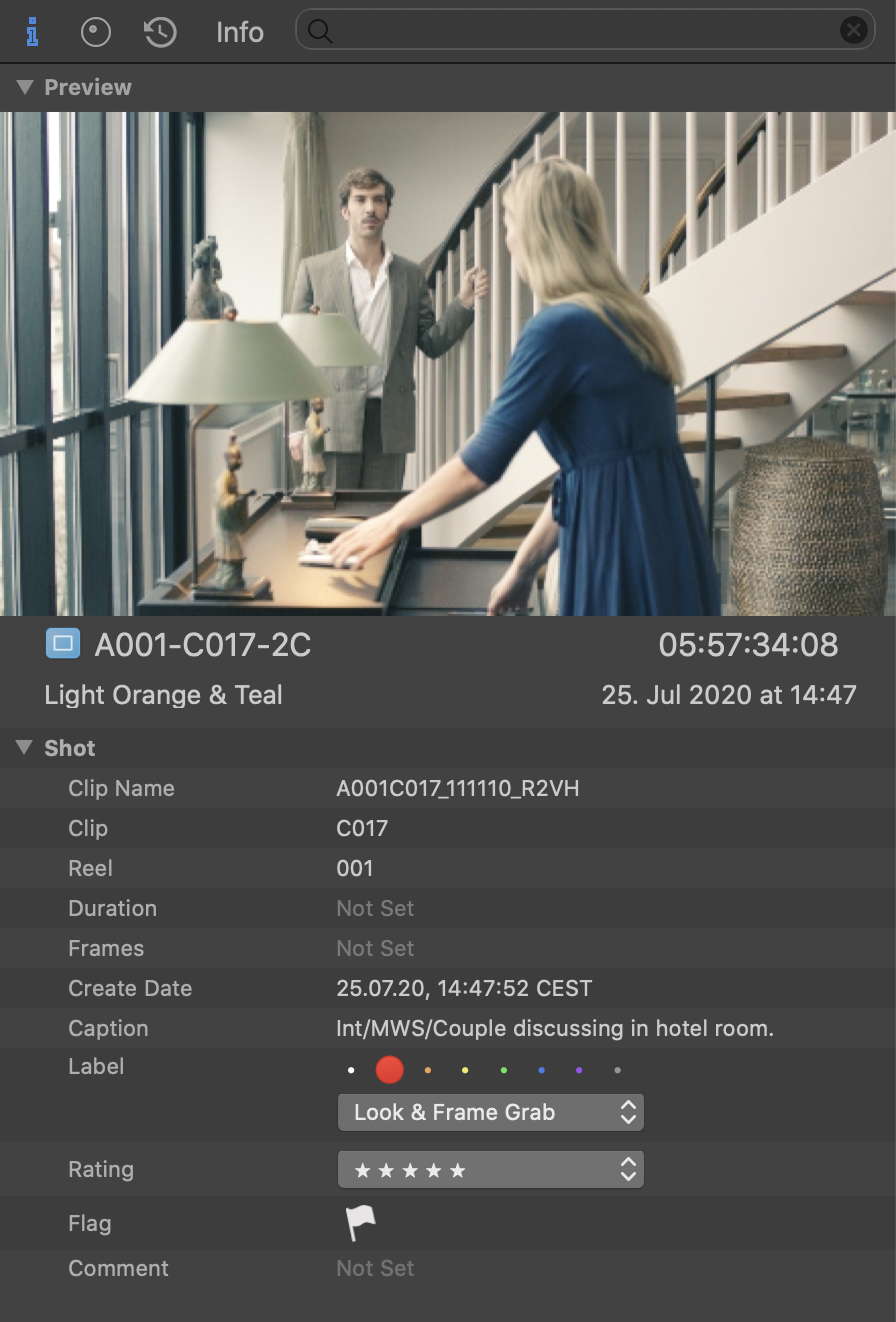
Info Tab
Importing Reference Images and Reference Movies
When building a new look it can be beneficial to import a reference image or reference movie in order to compare color, lightning and exposure with the current grade:
- Import images and movies by choosing “Import Media…” from the “File” menu and selecting one or multiple files.
- Import a still image from a movie file also by choosing “Import Sill From movie…” from the “File” menu. A pop-up window lets you playback and scrub through the selected movie and lets you set the position of the still image.
Note: The original media file will be copied into Livegrade’s recordings folder. Depending on the file size this might take a while. Imported reference media will show up in the shot library as soon as the copy process is done.
Search Code: LG-SL1