Livegrade comes with support for remote look control of the SONY F65 cinema camera. This feature enables the user to control the ASC-CDL values inside the SONY F65 that affect the look of the SDI1 output signal of the camera. Livegrade is connected to the SONY F65 via a network connection (LAN or WiFi depending on your setup).
Content
This article covers the following topics:
- How to set up the network settings in the camera to connect to Livegrade.
- How to set the look configuration in the camera to work with Livegrade.
- Guide through the process of adding the SONY F65 as a device in Livegrade.
- How to export a compatible 3D LUT from Livegrade and load it into the F65.
Setting Up the SONY F65 Network Connection
In order to exchange look information with Livegrade, the SONY F65 camera needs to have a working network connection with the Mac where Livegrade is running on.
The SONY F65 is capable of using DHCP to set its IP address automatically. Go to the “Network” settings of the camera and enable DHCP:

The network settings of the F65.
If not using DHCP, configure the IP and subnet mask manually for the Mac and the SONY F65 to be in the same network.
The shown IP address in the network settings of the camera (in this case 192.168.2.190) will be used in Livegrade to connect to the F65.
Setting Up the Look Configuration of the SONY F65
In order for the interactive control of the ASC-CDL values of the camera to work the color control of the SDI1 output of the F65 has to be set to a certain state.
The camera settings can be reached either directly on the camera to be output through the SDI or you can access them via a web interface. If the network settings are set up correctly you can access the web interface by entering the IP address of the camera into a web browser and hitting enter. Please note that those interfaces may have slightly different appearance.
In order to set the look settings of the camera for the use with Livegrade follow these steps:
- Access the settings of the F65
- Navigate to the section “VF / SDI“
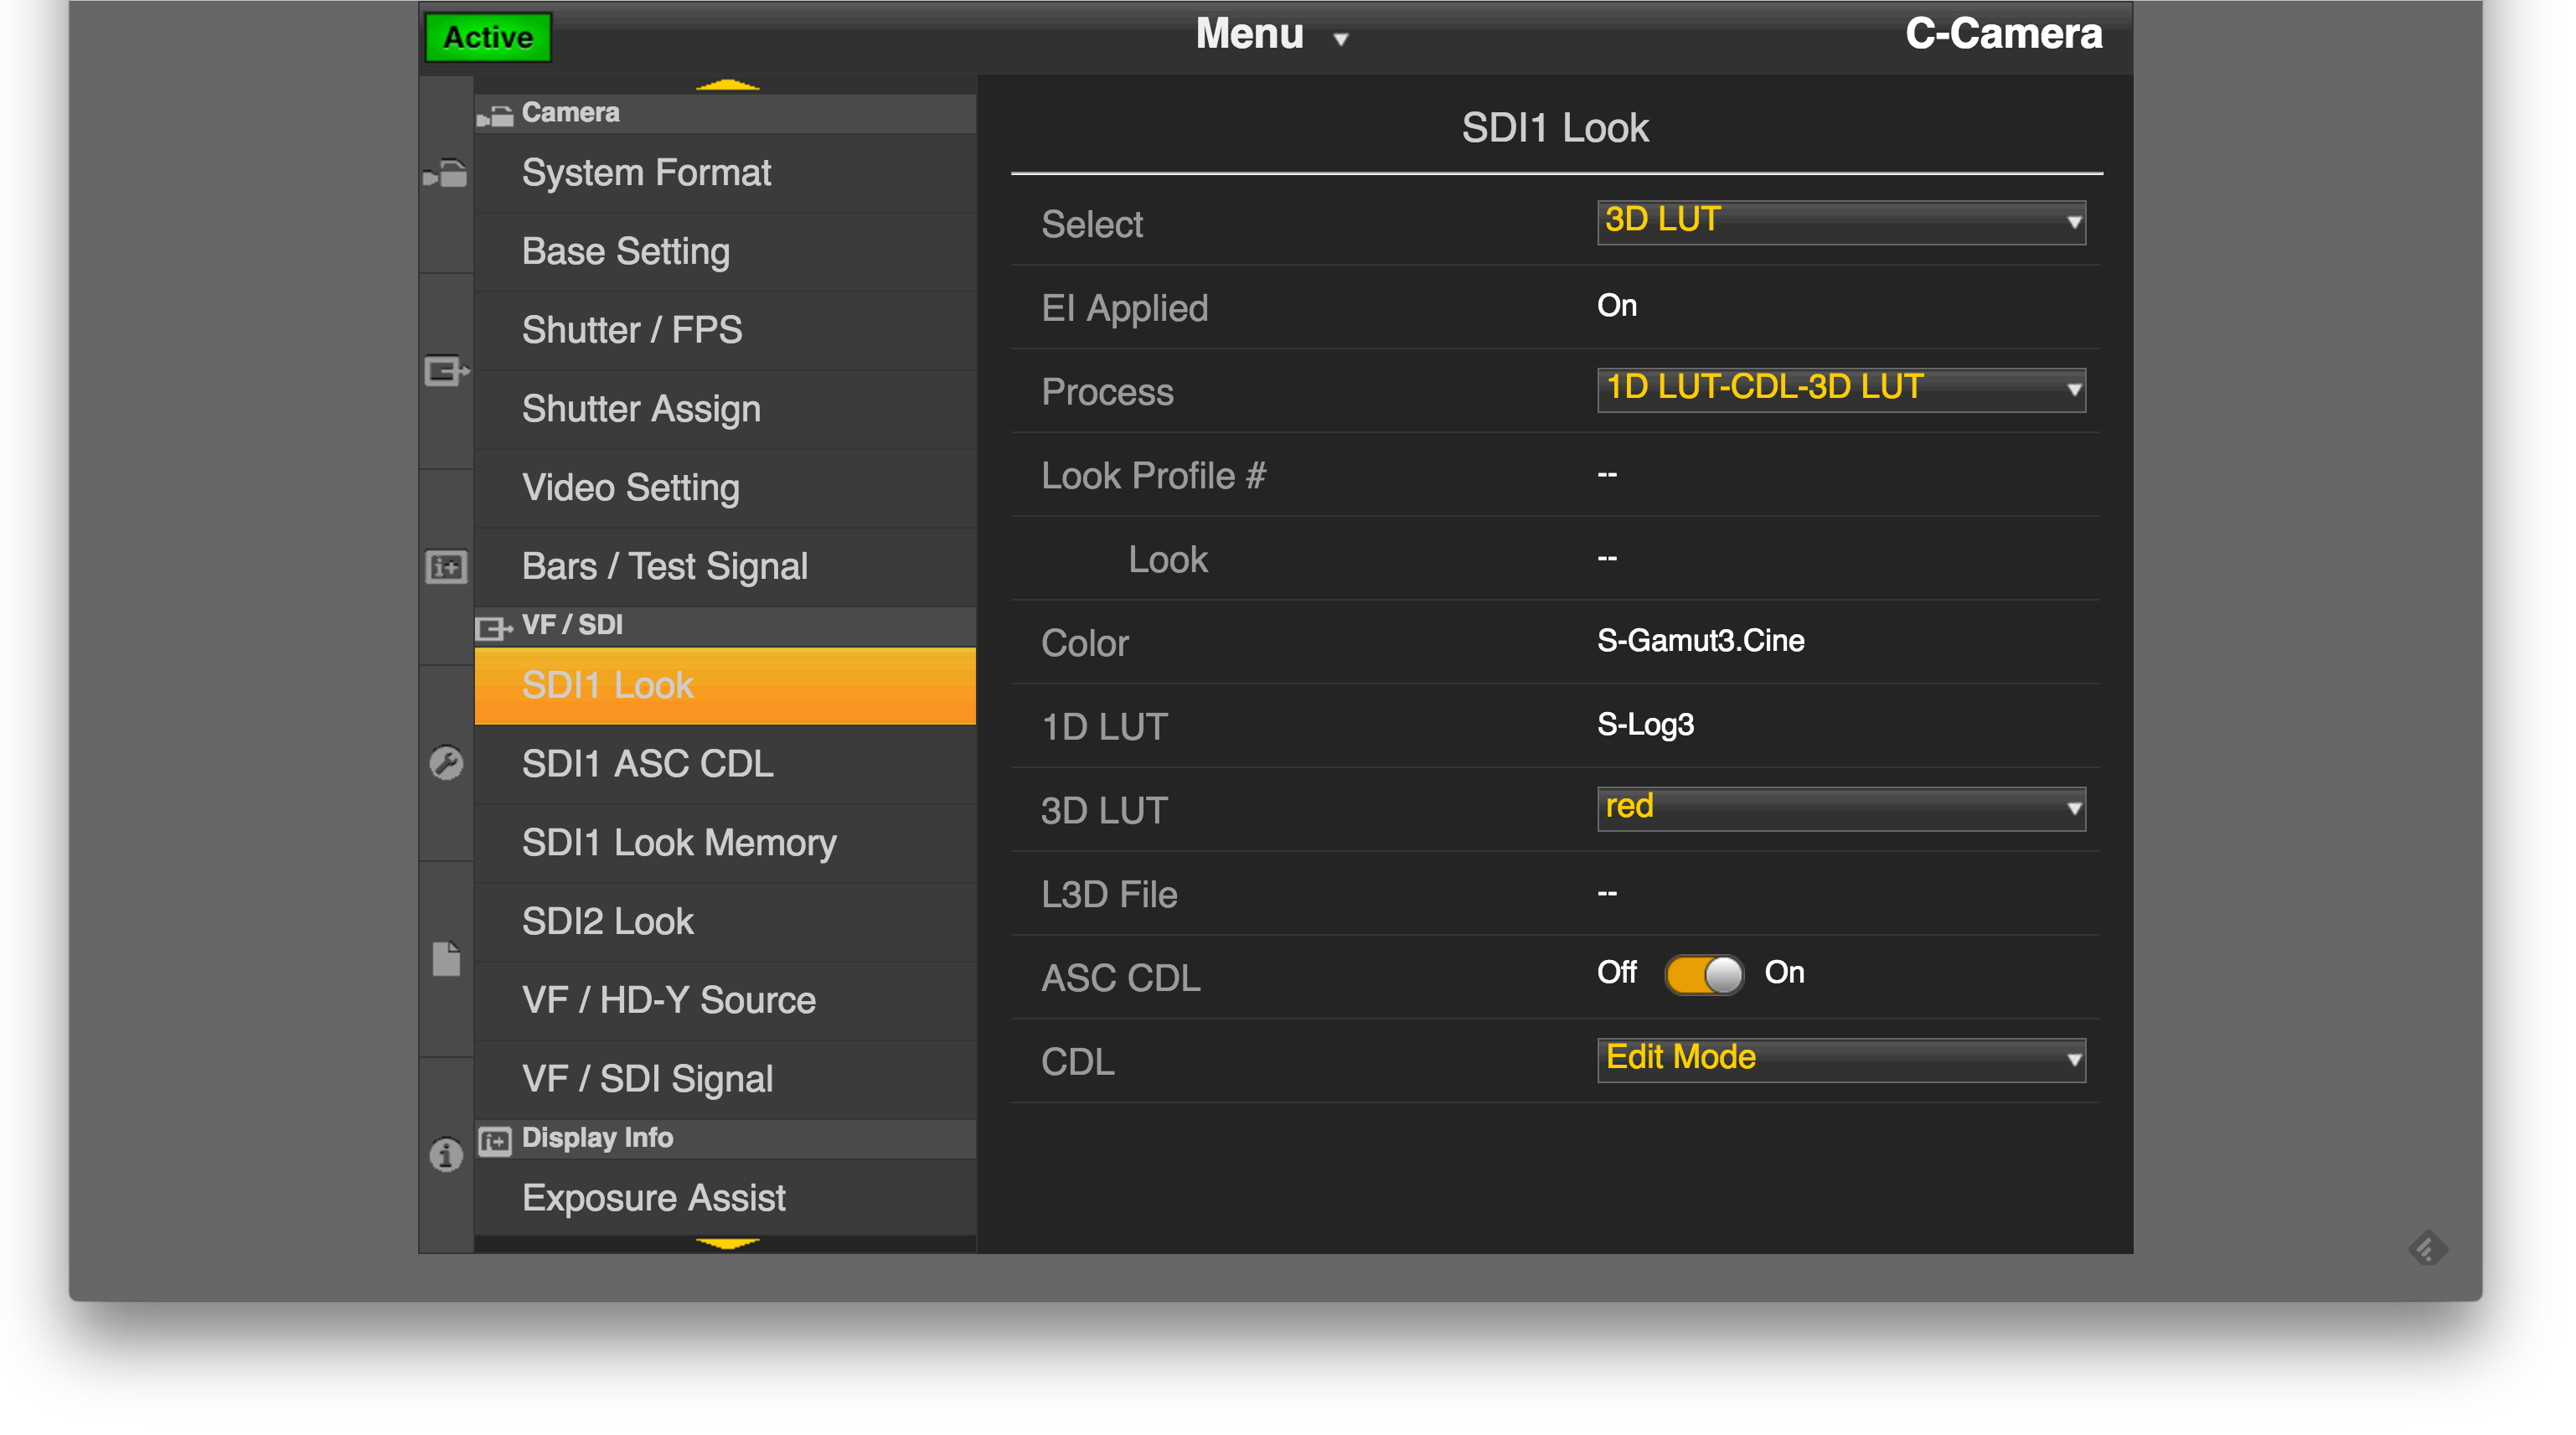
- Navigate to the page “SDI1 Look”:

“VF/ SDI” > “SDI1 Look”
- From the “Select” dropdown choose “3D LUT”:
-

“Select” > “3D LUT”
-
- Make sure the “Process” is set as “1DLUT – CDL – 3D LUT”
- At the entry “3D LUT“ choose the intended 3D LUT (in this case called “red”). Scroll down to learn how to load a custom 3D LUT to the camera.
- Make sure the “ASC-CDL” is set to “On”
- Make sure the dropdown at “CDL” is set to “Edit Mode”

Please note that due to hardware limitations Livegrade is not capable of controlling the 3D LUT inside the SONY F65 as it is possible with other integrated devices in Livegrade. Please read on to learn how to load a custom 3D LUT into the SONY F65 (see section “Export a Custom 3D LUT from Livegrade to Load it to the SONY F65”).
Adding the SONY F65 Camera as a Device
Once a correct connection is established, launch Livegrade and you can proceed to add the Sony F65 camera as a device. In order to do that, you can choose “Slots” in the main menu and then “Add Device”. Alternatively, you can add the device through the Device Manager.
A window will appear that asks for an IP address of the camera to add it as a device:
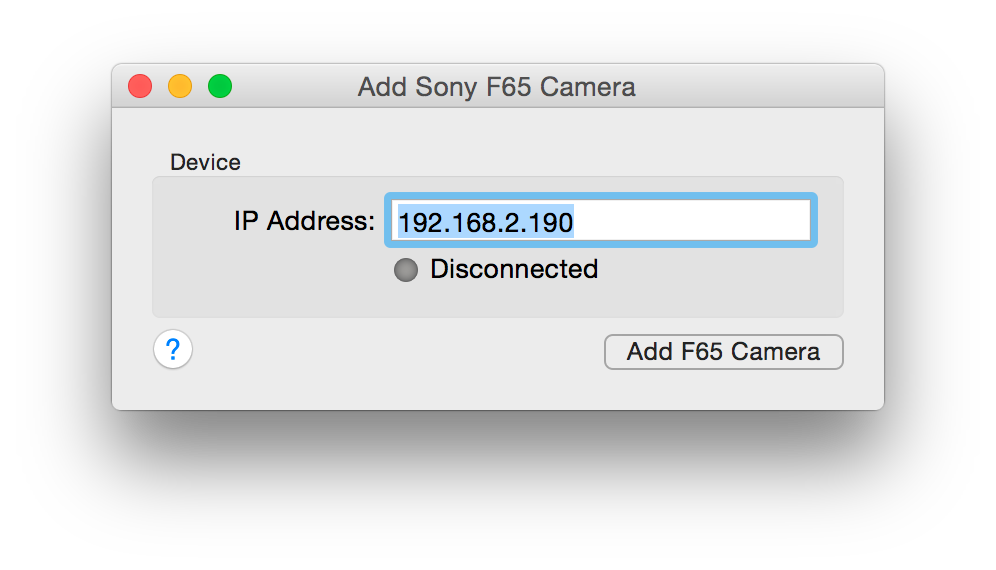
Enter the IP address of the camera.
Enter the IP address of the camera as displayed in the camera settings. Hit “Add F65 Camera”.
Open the Device Manger in Livegrade by clicking the button “Devices…” on the left side of the Livegrade user interface. The Device Manager will show a connected SONY F65 camera:
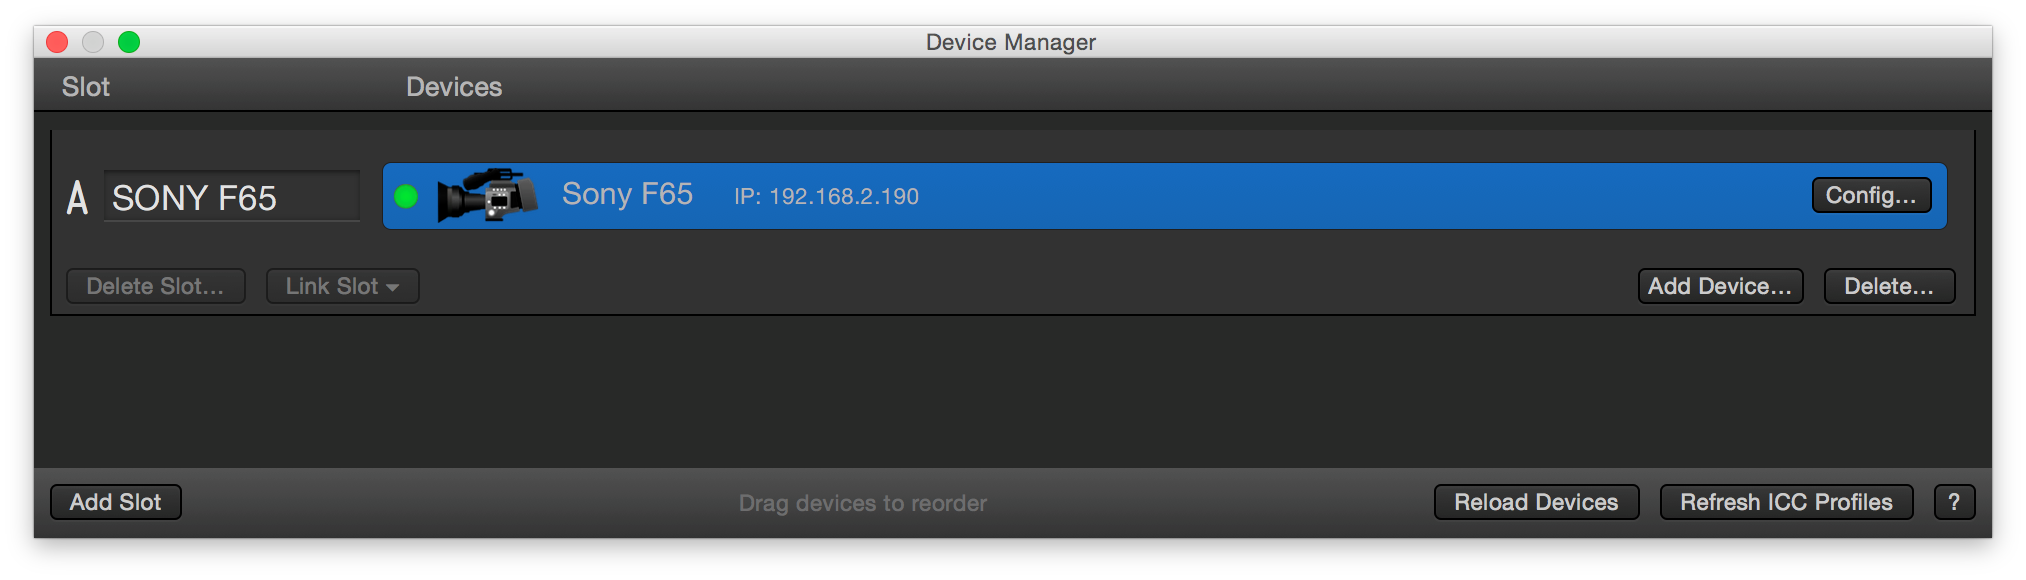
The SONY F65 is connected to Livegrade.
Livegrade is now able to control the ASC-CDL values of the camera SDI1 output. Please refer to the article Using the CDL Grade Mode in Livegrade for more information on grading controls in Livegrade.
Export a Custom 3D LUT from Livegrade to Load it to the SONY F65
Please note that due to hardware limitations Livegrade is NOT capable of controlling the 3D LUT that is set inside the camera. However it is possible to load a custom 3D look up table to the camera via an SD card.
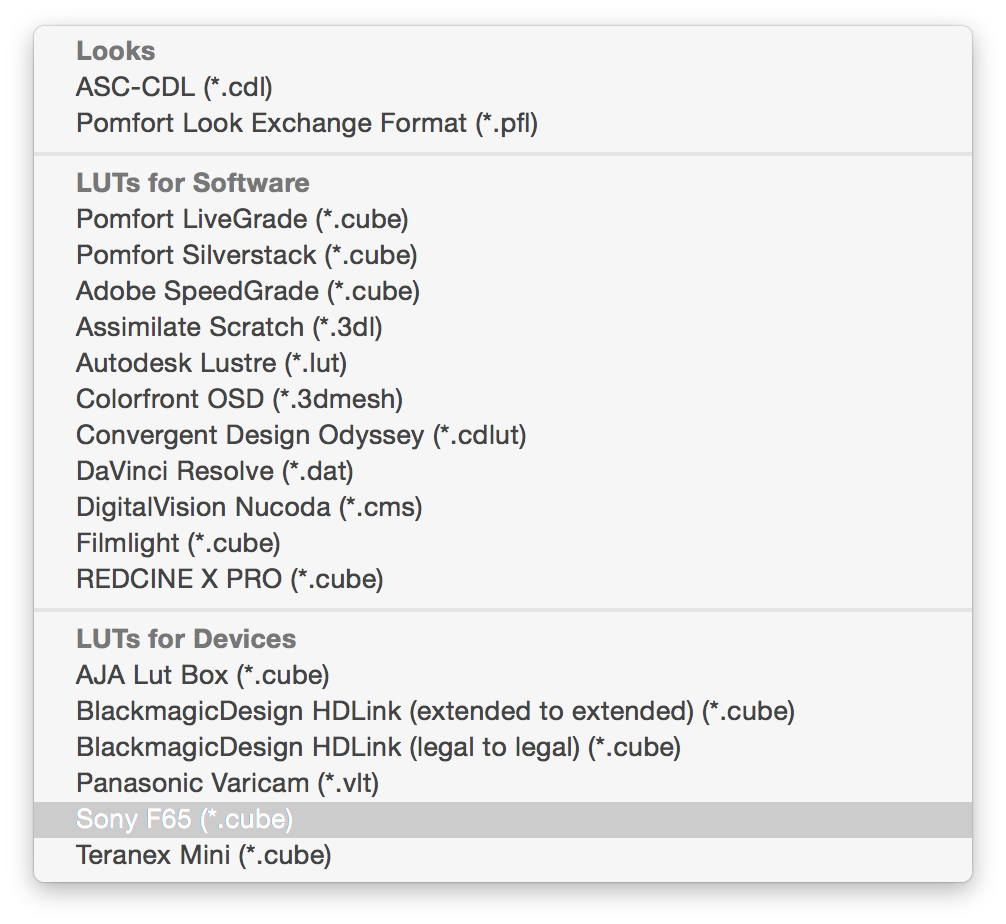
Livegrade is able to export a 3D LUT that is compatible with the SONY F65 (*.cube). Please refer to the article Exporting Grades to learn how to export 3D LUTs from Livegrade.
You will find an entry in the list called “SONY F65 (*.cube)”:
Exporting a 3D LUT compatible with F65.
Now you can copy the 3D LUT to the SD card to load it to the camera.
First format the SD card inside the camera:
- Put the SD card in the SD card slot of the F65
- Go to the “File” menu of the camera settings and select “Media Format”

“File“ > ”Media Format”
- In the “Media Format“ page select “M.S./SD Format”. This formats the card with the needed SONY folder structure:
-

Formatting the SD card
-


Put the SD card into your Mac. Inside the folder structure on the SD card copy the LUT you exported from Livegrade into the “F65” folder that should be located inside the PRIVATE/SONY/PRO/CAMERA/ directory.
Insert the SD card into the camera again. You will be able to import the 3D LUT from the “File” > “1DLUT/3DLUT File” Menu:
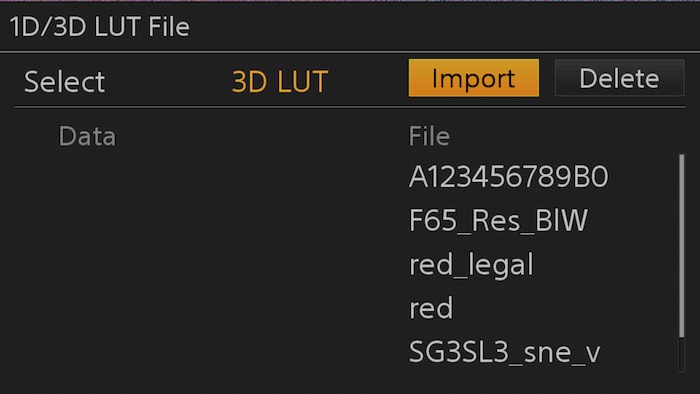
Import the 3D LUT into the F65.
After a successful import the imported 3D LUT will be available from the 3D LUT dropdown of the “SDI1 Look” settings.