Livegrade comes with support for Canon broadcast monitors. You’re able to send looks as 3D LUT to be applied on the monitor image by using a network connection (LAN or WiFi depending on your setup). Additionally Livegrade is capable of taking a framegrab from the monitor that can be saved to the Clip Library as a reference along with the look. In Dual Mode the monitors are capable of grading only one input.
For general information about setting up Livegrade with HD-SDI devices please refer to the article HD-SDI Setup for Livegrade.
A list of all the Canon Monitors supported can be found in the Knowledge Base article All Supported Devices in Livegrade.
Adding the Canon Monitor as a Device
Based on the example of the Canon DP-V2410 it will be demonstrated how to add a compatible Canon monitor as a device. In order to receive look information from Livegrade, the Canon monitor needs to have a working network connection with the Mac where Livegrade is running on. Once a correct connection is established, launch Livegrade and you can proceed to add the Canon monitor as a device. In order to do that, you can choose “Slots” in the main menu and then “Add Device”. Alternatively, you can add the device through the Device Manager.
After that, a configuration window opens:
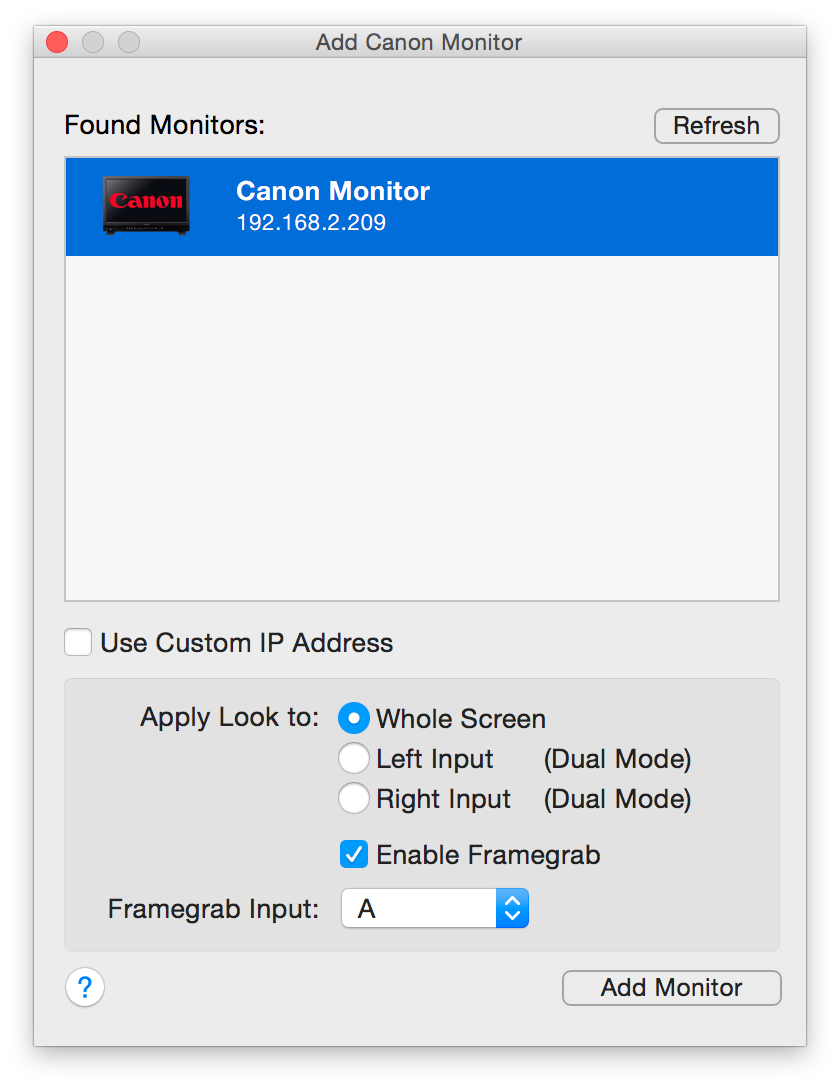
Add Canon Monitor
By hitting “Refresh” you can search for compatible monitors connected to your network. All monitors found will show up in the table view. Select the intended device and click “Add Monitor” to add the monitor to the selected slot.
Working with the Canon monitor in Livegrade
In the main Livegrade window, the Canon monitor is now displayed in the corresponding grading slot as a device.
After selecting the correct grading slot you will be able to adjust the look that is sent to the monitor by modifying it in the Main Window of Livegrade.
As the monitor permanently stores the last look that was sent, there is no need for the “Permanently Store Look on Device” functionality of Livegrade.
The Canon DP-V2410 and DP-V3010 monitors support a LUT size of 17 x 17 x 17.
Checking the Connection Status in the Device Manager
To learn more about the connection state of the Canon monitor you can open the Device Manager by clicking on the button “Devices” above the Grading Slots view.
If connected properly the Canon monitor will show up as a “Device” row in the Device Manager with a green indicator confirming a positive connection status :

The Device Manager shows a properly connected Canon DP-V2410.
By clicking on the button “Config…” an info window opens where you can see all information available on the connection of Livegrade with your monitor:

Canon monitor configuration window
By hitting “Disconnect” you can temporarily disconnect and reconnect the selected monitor.
Adding a Canon Monitor by Using a Custom IP Address
If you want to add devices by a certain IP address rather than letting Livegrade search for them in your network you can select the checkbox “Use Custom IP Address” to reveal a text field where you can enter the IP address of the chosen device:

Use a custom IP address to add a monitor
You can find out about the IP address of the monitor in the menu of the Canon monitor:
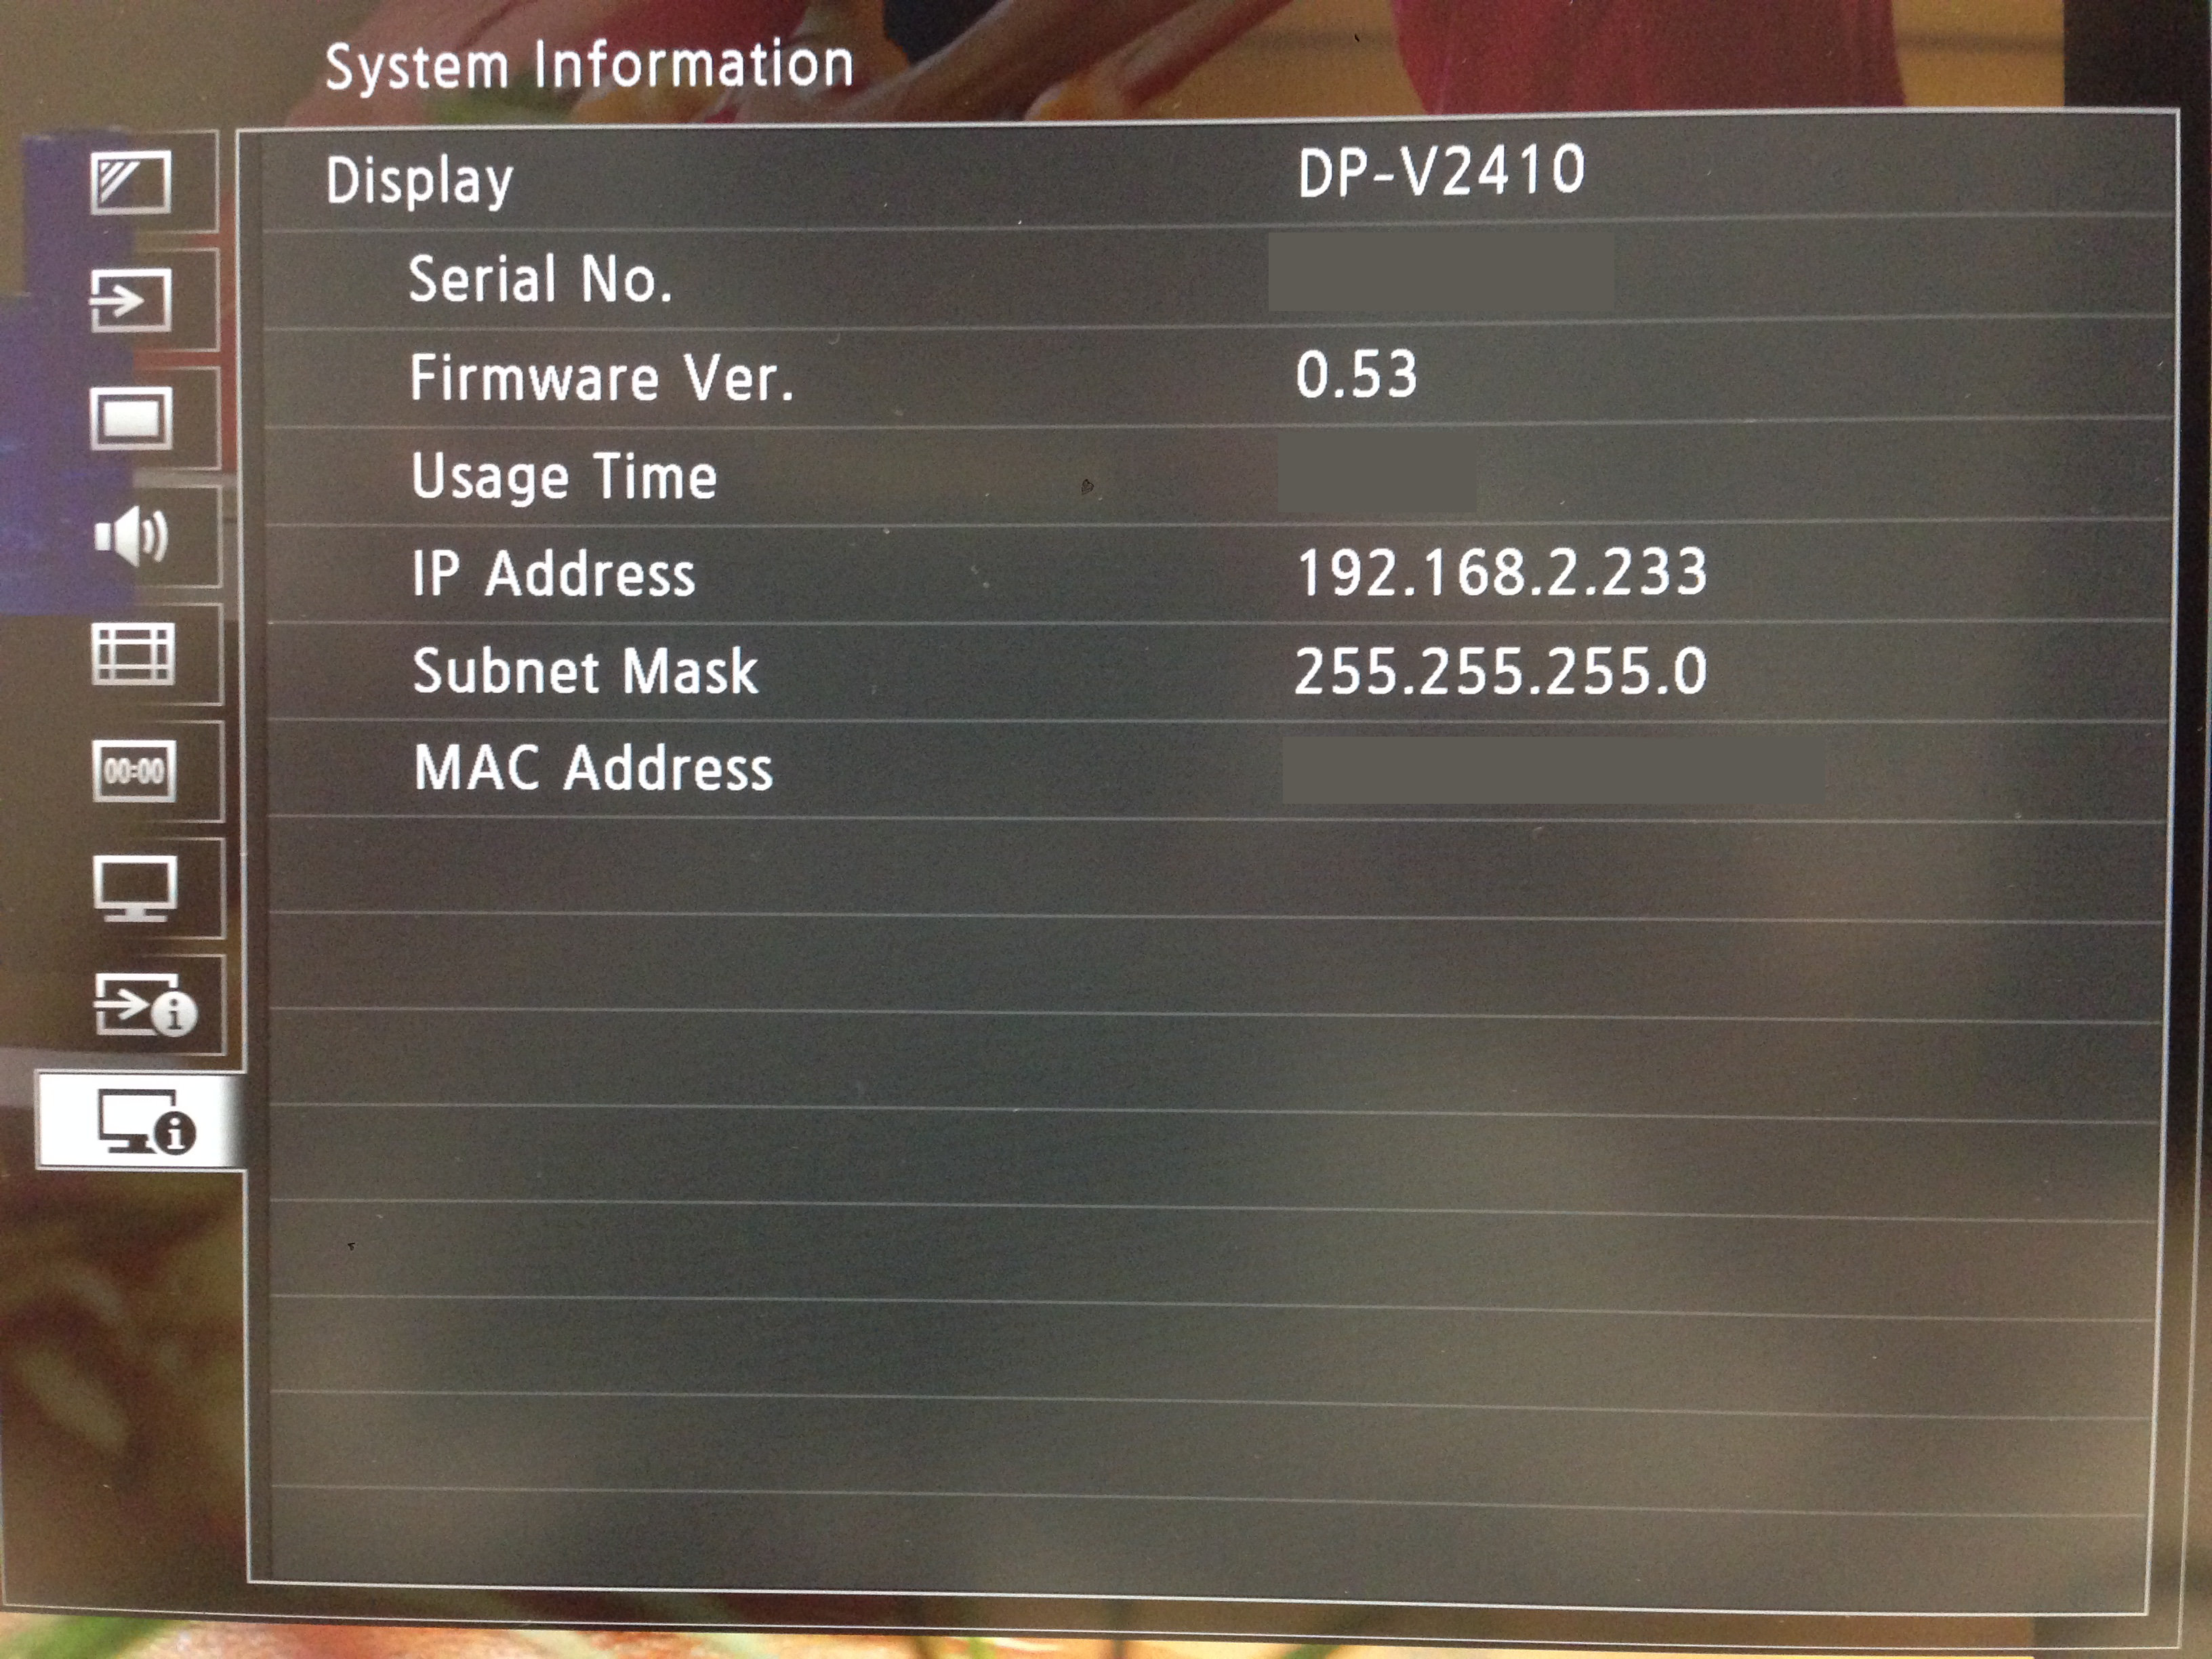
Finding the monitor’s IP address
In order to find the monitor’s IP address:
- Go to the Main Menu of the DP-V2410 by hitting the physical button “Menu” on the monitor
- Switch to the System Information tab by using the control knob of the monitor
- Note the IP address and insert it into the “Use Custom IP Address” text field in Livegrade
Grading on a Specific Input in Dual Input Mode
When adding a Canon monitor to Livegrade you can select a certain input when the monitor is running in “Dual Mode”. Choose the according radio button to add the left or the right input as the desired target.
An additional panel when adding the monitor as a device lets you control the input selection in Dual Mode, the enablement of a framegrab and the framegrab input source.
Enabling the Framegrab functionality
The supported Canon monitors are capable of taking a framegrab from the screen. To enable the framegrab funcitonality, please make sure to have the “Enable Framegrab” checkbox set when adding the Canon monitor as a device. The Framegrab Input dropdown lets you select the input the framegrab is taken from.
In the main Livegrade window, the Canon monitor is now displayed in the corresponding grading slot as a device, as well as the Canon monitor image as an Image Source of the slot.
You can open the Image Viewer to display the image by double clicking on the «Canon Monitor Image» thumbnail shown in the correspoinding slot.

The Canon Monitor Image in the Image Viewer
In case that the live image has changed, you can update the image shown in Livegrade by clicking on the «Refresh Image» button. After that you will have the latest frame of the live image.
Select the monitor image and click the “Framegrab” button on the top right of the Livegrade task bar. This will send a look to the library that includes a reference still.