Data transfer performance can be a very important issue in time-pressing environments such as scenarios of on-set data wrangling.
For a general list of factors that influence the speed of data-transfers such as
- storage technology,
- RAID technology, and
- interfaces
please refer to the document “Factors for data-transfer performance”.
How to analyze your setup for bottle necks
Every system is only as fast as the slowest component. So for example attaching a brand new, ultra-fast SSD to a computer via USB2 is no improvement in performance over a 5 year old HDD – the USB2 interface is the limiting factor. The following list helps you to find the bottleneck and to tune your setup for higher performance. Sometimes just using different connections (lots of devices have multiple, different connection ports) or replacing one component already can heavily improve the performance of an entire data-transfer system.
When for example copying data from e.g. a SxS card to an external RAID and a USB3 drive with Silverstack, a lot of components are involved – and the slowest one is slowing down the overall performance and thus all the other components.
In this example we can identify three data storage devices that are each consist of several components:
- SxS card
- the SxS card itself
- the card reader for the SxS card
- RAID system
- the interface to the RAID system
- the RAID system and its configuration
- the drives in the RAID system
- External drive
- the interface to the external drive
- the drive itself
1. Measure the maximum performance of each device
You can determine the speed of a device by measuring the read and write speed to that device individually and independently. On the Mac you can either use tools like Blackmagic Disk Speed Test or use command line tools such as “dd”.
Note:
Please note that the operating system caches disk access in RAM. So if you write a small file to disk it is still in the cache and a directly following read test will retrieve that file directly from RAM, so that the disk is not used at all in your test! So make sure that your test files are large enough (e.g. larger than RAM). As a good measure you can always use “Activity Monitor” that comes with OSX to monitor drive usage and performance (use the “Disk Activity” tab). For example when accidentally retrieving data from cache during a test you will detect that as zero activity on the drives in Activity Monitor.
Comparing the performance values of the different devices, you now know the slowest device. This device will slow down the entire data transfer, so maybe you can improve that first.
2. Observe the overall performance during the copy process
Now find out if the expected performance can be observed during a real life test. Start a copy process to multiple destinations in Silverstack and use Activity Monitor as your instrument for measuring performance.
In Activity Monitor you will see the current overall performance. So if you let Silverstack copy the contents of a SxS card to two drives simultaneously, you should see a write performance that is twice as high as the read performance during copy. After copying a verify-phase follows that reads the files from the two destinations and the source again. So you should see a very high, combined overall read performance.
In our example take the read- or half of the write-performance value during copy and use this value as your current reference copy performance. Compare it to the measured performance value of each device. It should be around the speed of the slowest device. If the reference performance value is much lower than the speed of your slowest device, there might be problems with daisy chaining.
3. Analyze the slowest device
If the speed of your slowest device (and thus the observed reference copy performance) is much slower than the speed of the other devices it might be worth improving that.
- Determine the speed of the drive by estimating the theoretical performance of the used drives by technology (HDD, SSD, RAID).
- Determine the theoretical speed of the interface.
You can now relate these values to your measured values for the entire device. If you experience completely odd values, maybe something is configured wrong (attaching a USB3 drive to a USB2-only port) or a component is faulty.
If the interface is the limiting factor, maybe you can change that by switching the enclosure with a better interface. Maybe there is a card reader with a faster interface available. If the drive is the limiting factor, find out if the drive is exchangeable with a similar or newer drive with better performance.
Modifying the read buffer size settings
The read buffer size settings use «2MB, recommended» as default. However, increasing the read buffer size might help when copying to software raids on OS X. Decreasing below the 2MB recommended value is usually not advised. The 2MB size recommendation is only illustrative. The optimal size depends on your specific setup and format combination.
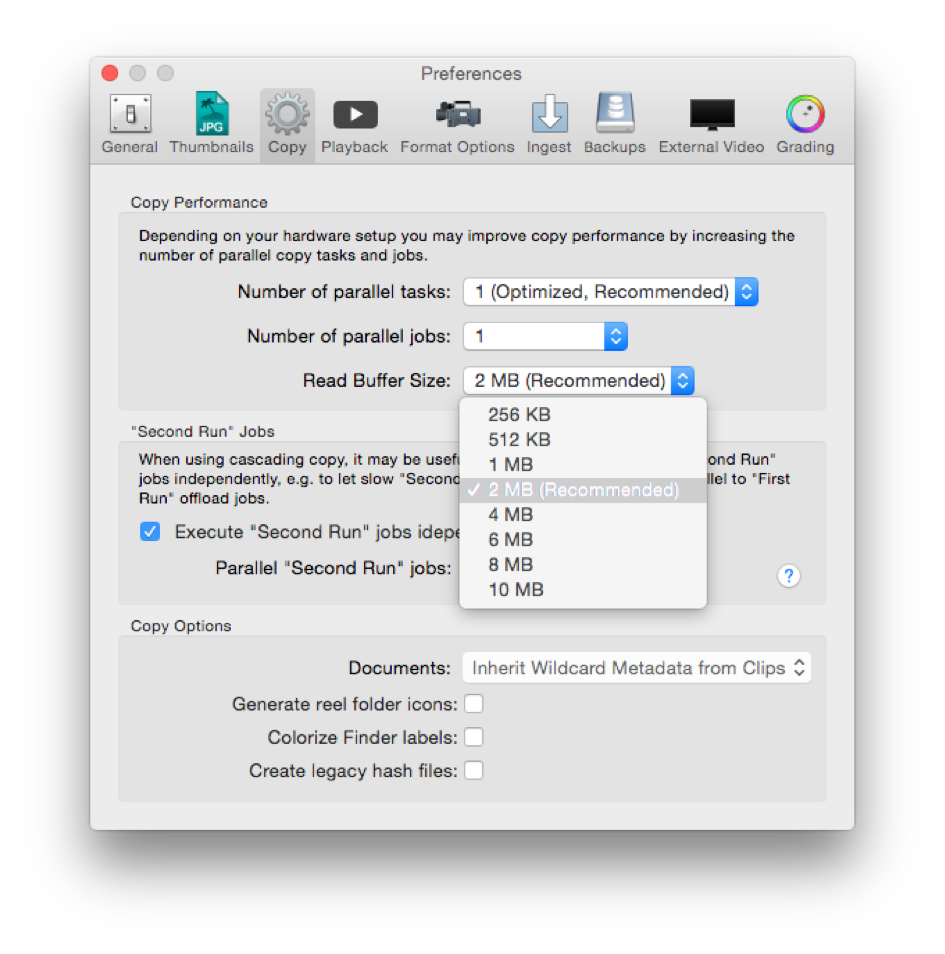
Preferences Menu: read buffer size