Silverstack XT and Silverstack Lab allow to import, display and export dynamic lens correction data from ZEISS CP.3 XD lenses. In particular this involves shading and distortion correction of the recorded image.
Overview
The following steps can be executed in Silverstack:
- Import lens correction data directly from Ambient Master Lockit Plus to consolidate it with the according clips in the library.
- Display and review shading and distortion correction via the ZEISS lens correction panel in Silverstack.
- Export .ZLCF lens correction files to transport lens correction data to consecutive applications
- More info about ZLCF plugins and supported applications on the ZEISS Website.
To learn more about the general workflow please visit the article ZEISS CP.3 XD Lens Correction: Workflow Overview.
Prior to importing lens correction data, clips have been recorded in the camera with the MasterLockit Plus attached to camera and lens.
Import Lens Correction Data from Ambient Master Lockit Plus
The lens correction data saved in the MasterLockit Plus holds a timecode relation to the clips recorded in the camera. The lens correction data be pulled via a network connection from the MasterLockit Plus and then be consolidated with the clips via timecode
- Offload the clips that have been recorded with lens correction data into the Silverstack Library
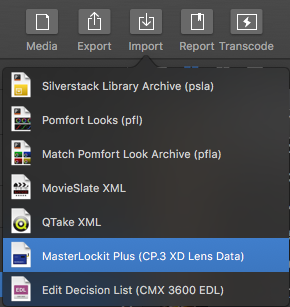
- Open the Import wizard through the “Import” button in the toolbar:

Fig. 1: Choose MasterLockit Plus (CP.3XD Lens Data) from the Import menu
- The lens data import wizard opens. Enter the MasterLockit Plus IP Address to the “Master Lockit Address” address field to connect to the Master Lockit Plus. After a successful connection the lens data events have been connected to the clips:
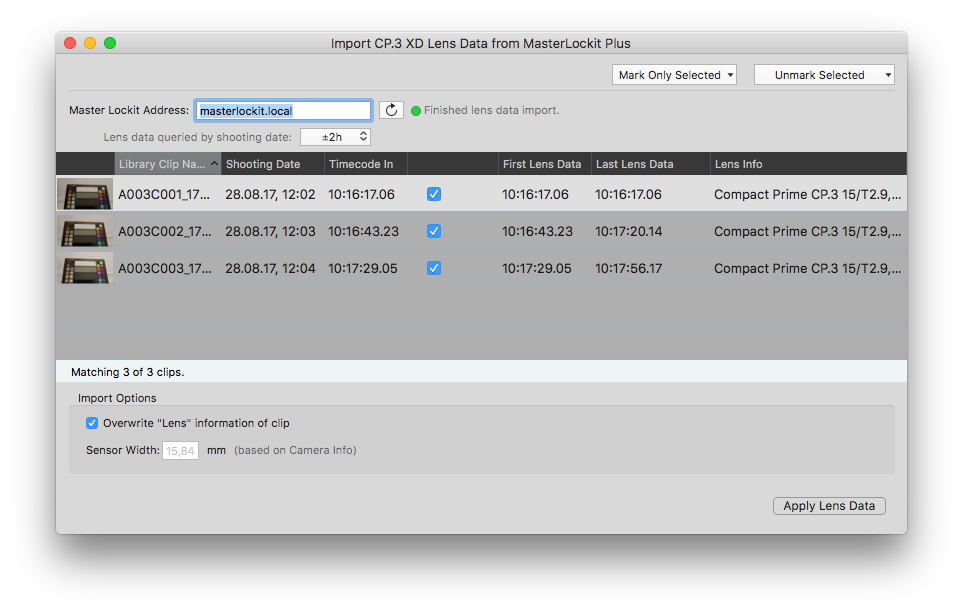
Fig.2: The lens data import wizard
Be aware that only clips that do not hold lens correction data will be displayed in the import wizard. Learn how to remove lens correction data in the sections below.
- Options:
- Lens data queried by shooting date: The lens correction data saved in the MasterLockit Plus will be queried for a certain time range around the shooting date of the clips. You can set a wider time frame for the query with this dropdown. By setting the time and date of the camera correctly you can initially make sure that the shooting date and time of the clips matches the timestamp of the lens correction data.
- Import Options
- Overwrite “Lens” information of clip: The lens info coming from the MasterLockit Plus can be taken over to the “Lens” metadata field in Silverstack.
- Sensor width: The sensor width is required to be able to display the lens corrections. Silverstack can determine (look up) the sensor width based on the following metadata of the clips (displayed as columns in the clips table):
- Camera manufacturer
- Camera model
- Sensor model
- Format description (only in cases where the above does not provide a unique sensor width)
- ResolutionThere are cases when an automatic detection is not possible (most probable caused by the lack of metadata of the clips). In this case you have to specify the sensor width manually to be applied to all clips where an automatic determination was not possible.
You can change the sensor width later in the General Info (right sidebar) under “ZEISS Lens Correction” (see details below).
- To take over the lens correction data to the clips click the “Apply Lens Data” button.
Extract Lens Correction Data from Clips
There are cameras that are capable of including the xD lens correction data directly in their recorded clips. Currently the following formats and cameras support the integration of eXtended Data in the recorded clips:
- REDRAW clips from RED DSMC2 cameras (firmware version 7.1 and above)
- X-OCN from SONY Venice cameras (firmware version 4.0 and above)
To extract the eXtended Data from the video clips you have to use the generic dynamic metadata extraction functionality. Learn more about how to extract dynamic metadata in Silverstack XT and Lab in the article Dynamic Metadata.
If eXtended Data is present in the clips, it will automatically be extracted along with the dynamic metadata. Please see the screenshot below for indicators if distortion and shading metadata is present, marked with a yellow rectangle.
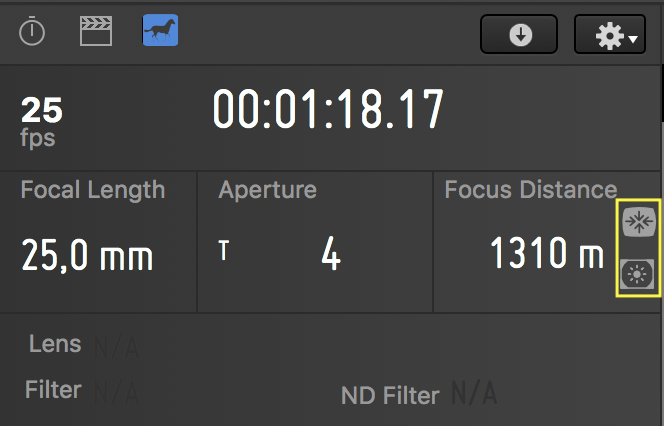
The indicators on the right show if shading and/or distortion data are available.
Display and Review Shading and Distortion Correction
The clips now hold lens correction data. The “ZEISS Lens Correction” entry in the General Info shows the enabled correction data:
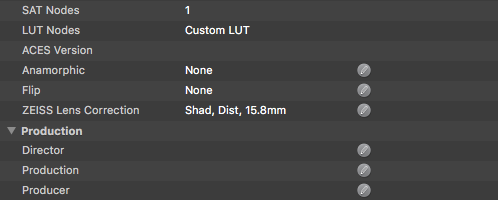
Fig. 3: ZEISS Lens Correction entry in the General Info
Click the pen icon to open the ZEISS lens correction popover:
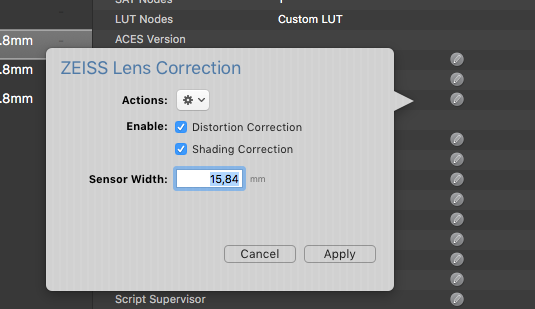
Fig.4: The ZEISS Lens Correction Popover in the General Info
- The ZEISS Lens Correction Popover in the General info allows for
- two different “Actions”:
- removal of lens data (for single and multiple clips)
- import of ZLCF file (only if no lens correction data is available for the clip)
- multi edit of shading and distortion correction activation
- multi edit of sensor width
- two different “Actions”:
The ZEISS lens correction panel can be opened from the “Look” section of the main menu:
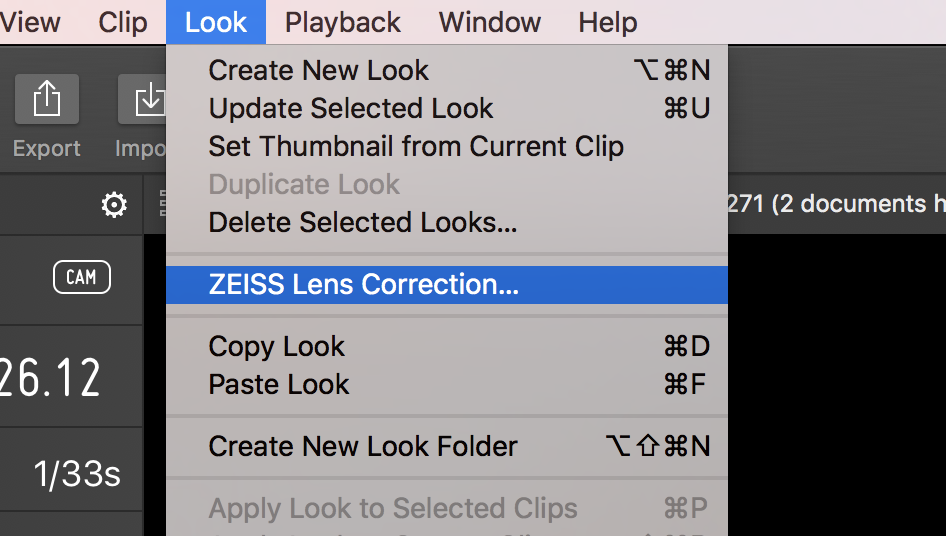
Fig.5: Open the ZEISS lens correction panel
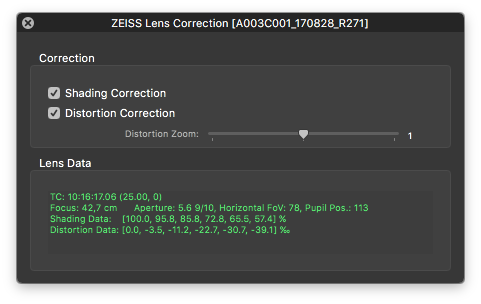
Fig. 6: The ZEISS lens correction panel
- The ZEISS Lens Correction panel allows for
- separate activation and deactivation of shading and distortion correction for display in player
- entry of distortion zoom factor
- dynamic lens data review per clip
The lens correction data will be displayed in the Silverstack player:

To export the status of the lens correction data into a clips report please activate the “ZEISS Lens Correction” column in the table view:
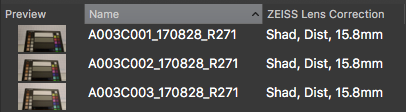
Fig. 8: The ZEISS lens correction column in the clips table view
Export ZEISS Lens Correction Files
The acquired lens correction data can now be exported per clip for consecutive productions steps. To open the export wizard go to the “Export” button menu in the toolbar and select the “ZEISS Lens Correction Files (ZLCF)” entry from the list:
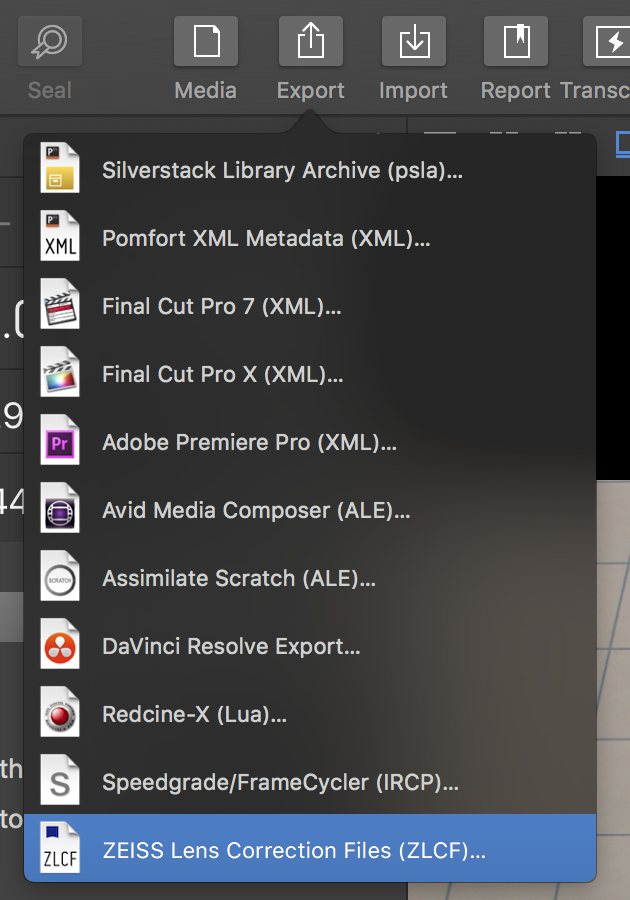
Fig. 9: Open the ZLCF export wizard
This opens the ZLCF export wizard:

Fig. 10: The ZLCF export wizard
Please be aware that the wizard only shows clips that hold lens correction data. All others will not be shown and are reflected in the status line at the bottom.
Per clip one .zlcf (ZEISS lens correction file) will be exported. After clicking “Export…” the wizard points you to select a folder for the zlcf files to be placed.