
Livegrade lets users export their grades to be used on the Odyssey 7Q+ recorder from Convergent Design. The grades can be loaded into the Odyssey 7Q+ device in order to be applied to the live HD-SDI signal on the built-in monitor.
You can use Livegrade’s broad range of grading features to create and export LUTs in Convergent Design’s .cdlut format. It is possible to get the same look on the field recorder display as in Livegrade and in post production tools (e.g. for dailies creation or color grading) – offering valuable technical as well as creative real-time feedback for DPs and DITs.
Exporting the grades to Odyssey 7Q+ devices
Once the grade has been created, it has to be selected from the library and then it can be exported as a 3D LUT.
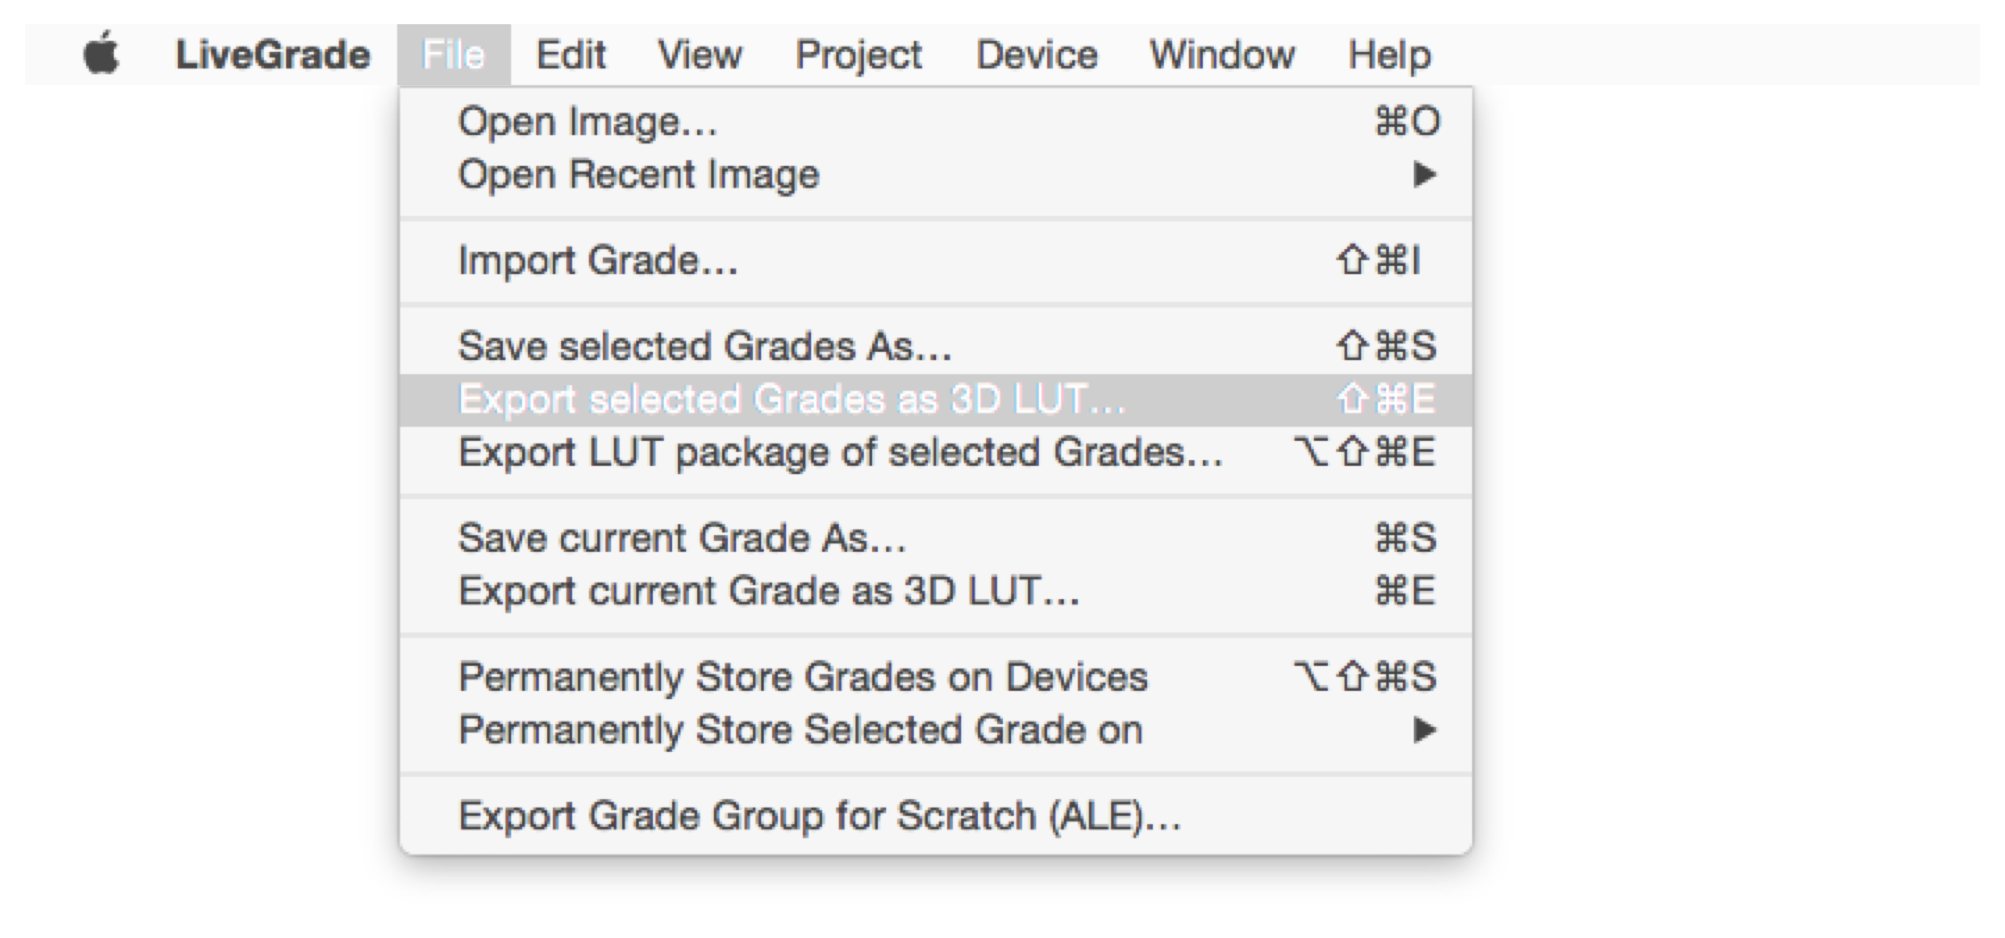
A 3D LUT format selection wizard appears. The «Convergent Design Odyssey» format has to be selected:
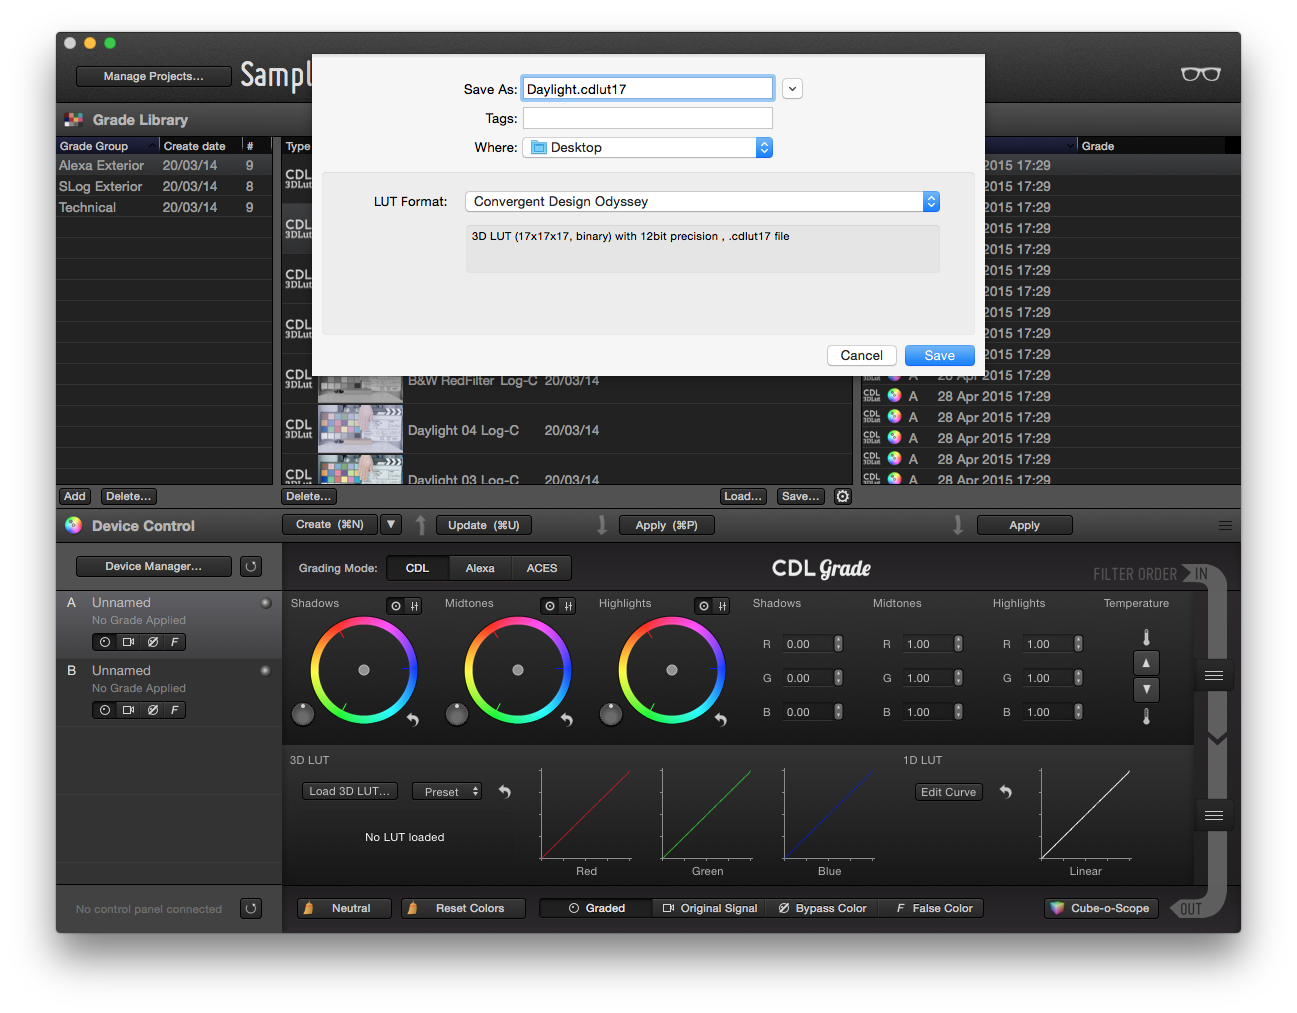
After the .cdlut17 3D LUT file has been saved on the desired destination, it is ready to be used. For more information on how to export grades, please check the article Exporting Grades.
Loading the grade into the Odyssey 7Q+ device
Once the 3D LUT has been exported, it has to be loaded into the Odyssey 7Q+ SSD drive. You can use Finder to place the .cdlut17 file into the specific folder on the SSD drive to help the Odyssey 7Q+ locate the grade.
Note: The .cdlut file file has to be placed into the LUT folder in the root directory of the SSD which has to be named “}CD_LUTS{” . If it does not already exist you have to create it.
After the grade has been copied into the SSD, you can attach it to the Odyssey 7Q+ device. If the SSD is correctly mounted you can see the LUTs load in the lower left corner of the home display.
To open the “LUT-Menu” perform a long tap on “LUT” in the home display:

Step 1: open the LUT menu
Then tap on «Import from SSD» and select all the LUTs that you would like to load:
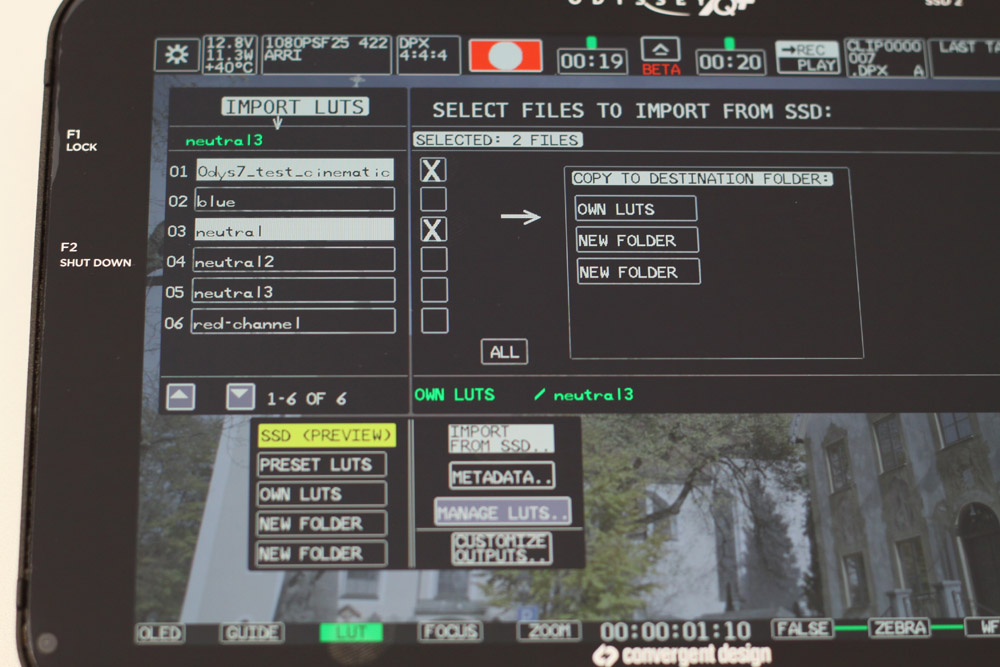
Step 2: import the LUT files
Confirm the operation:
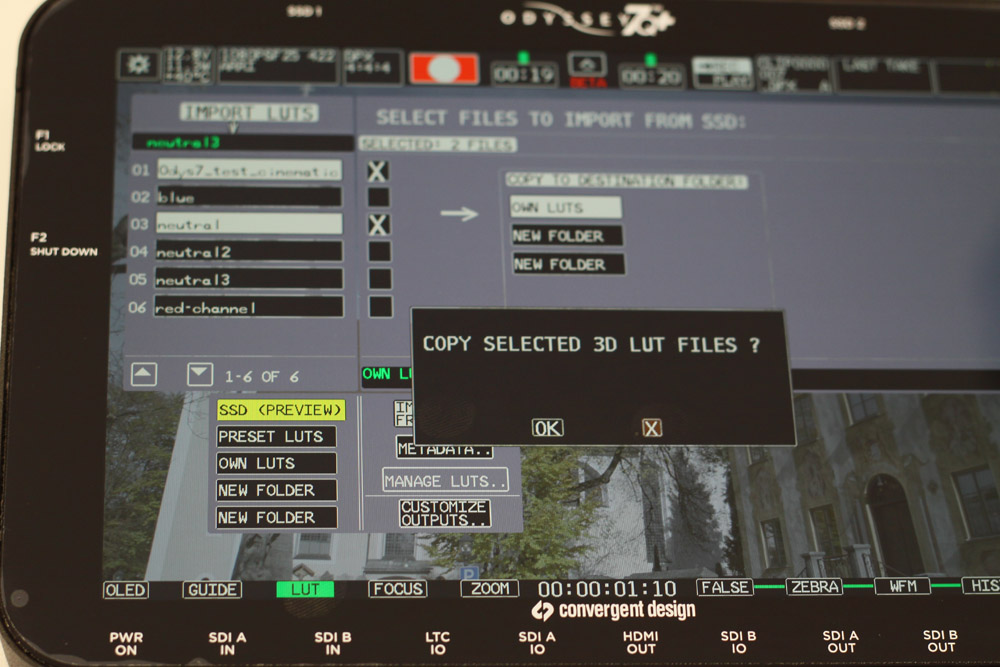
step 3: confirm the operation
Finally the imported grades should be available on the LUT selection menu:

step 4: select the LUT to be applied.
At this point you should be able to apply the LUTs imported previously to the current SDI signal. To select a specific LUT just tap on it in the menu and it will turn green. After closing the LUT menu you will be able to enable or disable the LUT by performing a short tap on “LUT” in the home display.