The shot library can stores shot entries in order to maintain a complete shooting history.
Each shot can include a broad range of metadata fields, e.g.
- clip name,
- camera identification,
- look metadata,
- slate information,
- exposure information,
- lens information,
- comments, and
- ratings, flags.
Note: You can customize the behavior for editing the slate info fields in the “Slating” preferences, see the article Application Preferences for further information.
Shot entries can also have media assets attached. So a shot can be stored as:
- Still: Still images stored as captured (may be “log”), with look metadata
- Clip: Movie recordings as captured (may be “log”), with look metadata
The icon in the “Type” column will help you differentiate them:
 Shoot with look (no media asset available)
 Still (captured or imported frame in full resolution available)
 Clip (captured clip in full resolution available)
 Pre-graded still (look has already been applied to still before capturing (e.g. by a LUT box)
 Pre-graded clip (look has already been applied to still before capturing (e.g. by a LUT box)
Additionally every Type can have a chain icon overlay that symbolizes a linked look (e.g. a still with a linked look):
 Linked Look Still
Read more about linked looks in the article Linked Looks.
Adding items to the shot library
There are different ways to add an item to the shot library. The create buttons behave differently depending on the current mode:
- Create: Create a new shot with metadata and capture a frame grab
- Record All: Start recording a new clip
See the article HD-SDI Signal Recording and Frame Grabs for more information about capturing stills and clips.
Additionally, you can import images from .JPEG, .TIFF and .DPX files. Still frames can also be imported from .MOV files. This way you can use them to create looks on your computer display or as a reference to compare against the live video signal.
To import an image into the Library, select “Import Image / Movie File…” or drag a file onto the application’s dock icon.
It is possible to enable/disable the forcing of the color profile to Rec.709 of the loaded images. This setting tells the application not to use the embedded color profile of the imported media asset and use Rec.709 instead. You can modify this setting in Preferences>Advanced.
Adding metadata to a new shot
When creating a new shot (with the “Create Shot” menu entry in the Library menu, or with one of the “+” buttons in the slot UI), the global metadata (e.g. for slate information), and metadata from each slot (e.g. technical metadata) is used for the new shot.
In case the metadata table in the slot UI is currently not shown, a quick entry panel is shown in order to review metadata bore storing it in the shot library.
You can
- always show the quick entry panel by choosing “Create Shot With Entering Information…”, or
- never show the quick entry panel by choosing “Create Shot Without Entering Information”
in the “Library” menu.
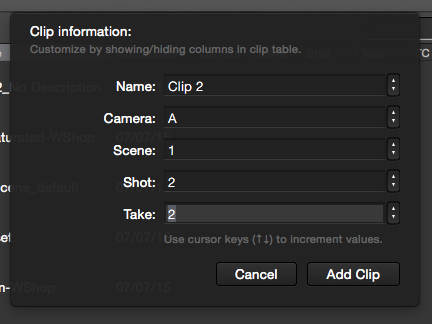
Metadata quick entry panel
Review a recording in the library slot and create new shots with stills
You can review a movie recording by loading it into the library slot. You can playback or scrub through the clip to find significant frames that are valuable to keep as reference. With the libary menu item “Create Shot With Still at Playhead Position” or an associated controller action you can create a new standalone shot with a still taken at the playhead’s position. The new shot will inherit the metadata from the original movie recording.
Note: Similarly, you can duplicate a shot with a recording as a new shot with a still image taken at the thumbnail frame’s position directly in the shot library.